

Highest Priority Entities First
LegacyHow this worked in the previous version
When you have multiple entities with varying priorities and you always want to work on the highest priority entities before the lower priority entities.
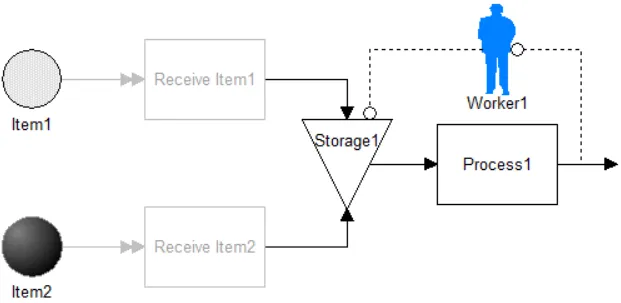
Where to Find the Model Object
Section titled “Where to Find the Model Object”The following model object can be found in the model objects directory:
- Priorities - Highest Priority Entities First
Difficulty Level
Section titled “Difficulty Level”- Ease of Use: Easy
- Ease of Modification: Easy
How to Use the Model Object
Section titled “How to Use the Model Object”-
Open Your Model: Open your model or create a new blank model.
-
Insert the Model Object into Your Model
-
Locate the model object Highest Priority Entities First and select the insert button.
-
Move the cursor to the point of insertion and left mouse-click. The upper left corner of the model object will be inserted at the location of the mouse-click.
-
Connect to Your Model
-
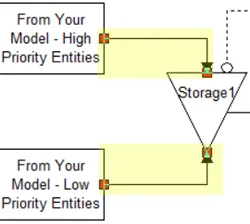
**Connect **the percentage routes entering **Storage1 **to the locations in **your model **where unique entity types will come from.
Make sure the resource connector lines are maintained as-is. Altering them will cause the prioritization to work improperly.
This model will pull high priority entities from Storage1 before lower priority entities.
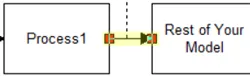
- **Connect **the percentage route leaving Process1 to the location in your model where you want the prioritized entities to continue to.
-
Update Action Logic
-
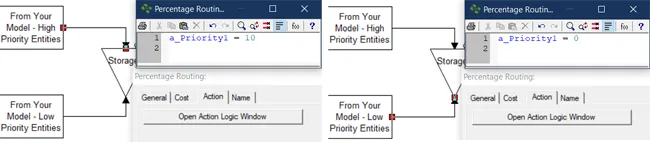
**Goto **the action logic tab of the two routes entering **Storage1 **and update the values for a_Priority1.
If you have priorities set elsewhere in the model you can remove the action logic on these routes.
Each route contains action logic which determines the entity priority with the top route having the highest priority. If you need to add more routes, make sure you include action logic similar to the existing route’s action logic, unless you are setting priorities elsewhere in the model.
- Update Objects: **Change **the names of Storage1, Process1, and **Worker1 **to match your organization.
The **Worker1 **resource must be dedicated to the prioritization process and should not be used for any other purposes in your model.
- Completion: The model object is now integrated into your model, you should now be able to save and then simulate the model.
Controls Usage
Section titled “Controls Usage”Attributes:
Section titled “Attributes:”- a_Priority1: Do not change. Entity priority (the higher the number, the higher the priority).
Advance Topics
Section titled “Advance Topics”How Do I Build This Model Object from Start?
Section titled “How Do I Build This Model Object from Start?”- A priority attribute (a_Priority1 in this case) is assigned in the routes entering Storage1, entities arriving from the top route are considered high priority, while the entities arriving via the lower route are low priority.
- At Storage1, the **Worker1 **resource is captured using the priority attribute name **a_Priority1 **in the resource connector’s Priority field.
- **Worker1 **is freed when the **Process1 **activity is complete.
Notice that Process1 does not have an input queue, Storage1 works as the input queue for Process1.