
Conveyors
LegacyHow this worked in the previous version
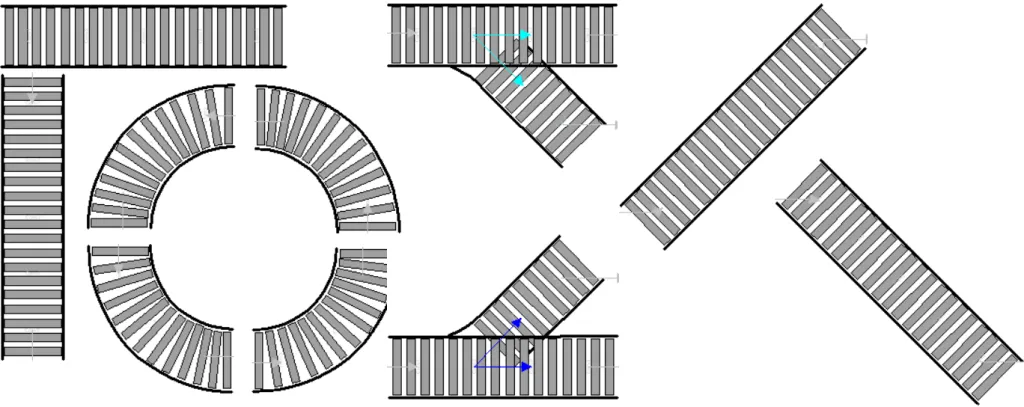
Use this model object to represent the behavior of a conveyor segments traveling right, left, curve, up, down, upper quadrant, or lower quadrant for 3, 5, or 10 segments.
Where to Find the Model Object
Section titled “Where to Find the Model Object”The following model objects can be found in the model objects directory:
- Conveyors - Curve Ccw, Down, Lower Quadrant, 3 Segments.
- Conveyors - Curve Ccw, Down, Upper Quadrant, 3 Segments.
- Conveyors - Curve Ccw, Up, Lower Quadrant, 3 Segments.
- Conveyors - Curve Ccw, Up, Upper Quadrant, 3 Segments.
- Conveyors - Curve Cw, Down, Lower Quadrant, 3 Segments.
- Conveyors - Curve Cw, Down, Upper Quadrant, 3 Segments.
- Conveyors - Down, Right, 45 Degrees, 5 Segments.
- Conveyors - Down, Vertical, 5 Segments.
- Conveyors - Left, Horizontal, 3 Segments.
- Conveyors - Left, Horizontal, 5 Segments.
- Conveyors - Left, Horizontal, 10 Segments.
- Conveyors - Right, Horizontal, 3 Segments.
- Conveyors - Right, Horizontal, 5 Segments.
- Conveyors - Right, Horizontal, 10 Segments.
- Conveyors - Split, Right, 45 Degrees Down, 4 Segments.
- Conveyors - Split, right, 45 degrees up, 4 segments.
- Conveyors - Up, Right, 45 Degrees, 5 Segments.
- Conveyors - Up, Vertical, 5 Segments.
How to Use the Model Object
Section titled “How to Use the Model Object”-
Open Your Model: Open your model or create a new blank model.
-
Insert the Model Object into Your Model
-
Locate the model object and select the insert button.
-
Move the cursor to the point of insertion and left mouse-click. The upper left corner of the model object will be inserted at the location of the mouse-click.
See how Conveyors work
Section titled “See how Conveyors work”- **Connect to Your Model **
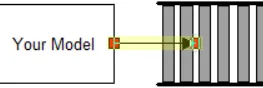
Connect a route from **your **model to the middle connecting point of the first segment of the conveyor.
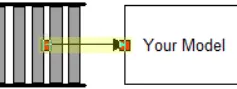
- Connect a route from the middle connecting point of the last segment of the conveyor to the remainder of your model or to another conveyor segment.
- Define Values
Set the move time of the routing going to the conveyor and from the conveyor(s) to 1/s_SegPerMin.
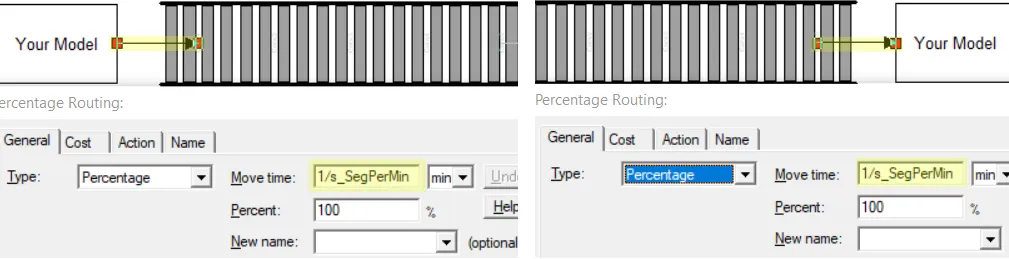
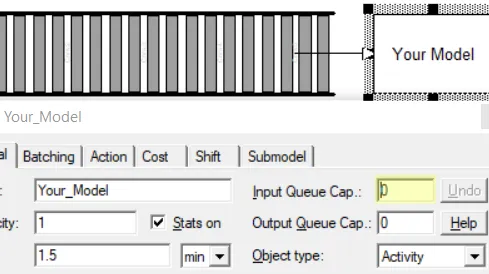
- Set the input queue of the destination activity to **zero **(if the conveyor must stop when the destination is full).
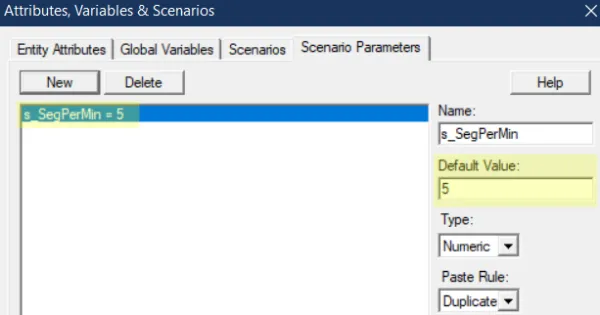
- Set the value for scenario parameter **s_SegPerMin **to the segments per minute **you **want it to operate at.
If the parameter is set to 5 segments per minute, then an entity will take 12 seconds (60 seconds / 5 segments) per segment or 36 / 60 / 120 seconds to traverse a 3 / 5 / 10 segment conveyor.
Changing value of s_SegPerMin
One segment from a 5 segment conveyor ungrouped
- Completion: The model object is now integrated into your model, you should now be able to save and then simulate the model.
Controls Usage
Section titled “Controls Usage”Scenario Parameters:
Section titled “Scenario Parameters:”- s_SegPerMin: Describes the speed of the conveyor in segments. Each segment of the conveyor will hold one entity at a time.
Advanced Topics
Section titled “Advanced Topics”Combine Multiple Conveyors
Section titled “Combine Multiple Conveyors”You can paste as many conveyor segments as needed to create an accurate representation of your system. All segments are currently grouped as a single unit. The following will explain how to add or delete segments or attach a different type of conveyor.
- You must first **ungroup **the segments by clicking on the conveyor, then clicking Arrange / Combine / Ungroup.
The connecting routes have a color of None. So use caution when altering the segment arrangement.
- Ungrouping will allow you to:
Delete individual conveyor segments by **selecting **the **segment **and pressing the Delete button on your keyboard.
Deleting a conveyor section
- Add another individual conveyor segment by **selecting **a segment and then copy (CTRL +C) and **pasting (CTRL + V) **it. You can then **connect **the new segment to the **rest **of the conveyor by using a percent route with Move Time as 1/s_SegPerMin.
New segment added and connected
-
Attach a different conveyor by Inserting it into your model. You can then **connect **the new conveyor to the **rest **of the conveyor by using a percent route with Move Time as 1/s_SegPerMin.
-
Optional: Change the connecting route color to transparent by right clicking on a **route **and then selecting Format, you can then **change **the Line Color to None and then click OK.
You can change the route color of multiple routes together by holding the Shift button and selecting all the routes needed and then right clicking on any of the selected routes.
Changing color of two routes simultaneously
-
Optional: **Align **all the conveyors and / or segments to match.
-
**Group **all the conveyors and / or segments **together **by selecting all the conveyor segments. Hold Shift and then **select **all segments and associated routes and then click Arrange / Combine / Group.
You can also hold left click of your mouse in a blank area above and left of the conveyors, drag and select all conveyors and associated routes.