

ProcessModel 7 Self Teach GuideChapter 8
Chapter 8. Tag Each Customer and Count the Jobs
By the end of this chapter you can
Tag each customer with an attribute and count jobs with a variable and Action Logic.
Before you start
So far every walk-in customer was alike, and nothing in the model kept count of anything. A real shop knows more: what kind of phone each customer brought, and how many jobs are done today. This chapter gives the model that memory, with three tools that work together in almost every serious model:
- An attribute travels with each customer. Every customer carries its own value, so two customers can hold different ones. Here: each customer’s phone type, Newer or Older. Attribute names start with a_.
- A variable is one value for the whole model, shared by everything in it. Here: the number of jobs done. Variable names start with v_.
- Action Logic is a short set of instructions that runs on each customer as it passes a step. It is how you set an attribute, raise a count, and act when something happens.
A name must be declared before logic can use it. ProcessModel never makes one up: a name used in logic that has not been declared is refused. So you declare the attribute and the variable first, then write the logic.
Here is what changes in the shop:
| Part | Chapter 7 | Chapter 8 |
|---|---|---|
| Phone type | None | Check In gives each customer a phone type: 8 in 10 Newer, 2 in 10 Older |
| Older phones | Walk-ins all try Quick Fix first | Customers with an Older phone skip Quick Fix and go straight to the Repair Queue, with the office customers |
| Job count | None | Pick Up counts each finished job, and shows a message at the 30th |
| Everything else | As Chapter 7 left it | Unchanged; no shape moves |
You need your Phone Repair Shop from Chapter 7 (or the practice model below) and about forty minutes.
Step 1. Open your shop
- On the Welcome screen, under Recent Models, click Phone Repair Shop.
What you should see: the shop as Chapter 7 left it, with two Technicians on real shifts.
Step 2. Declare the attribute
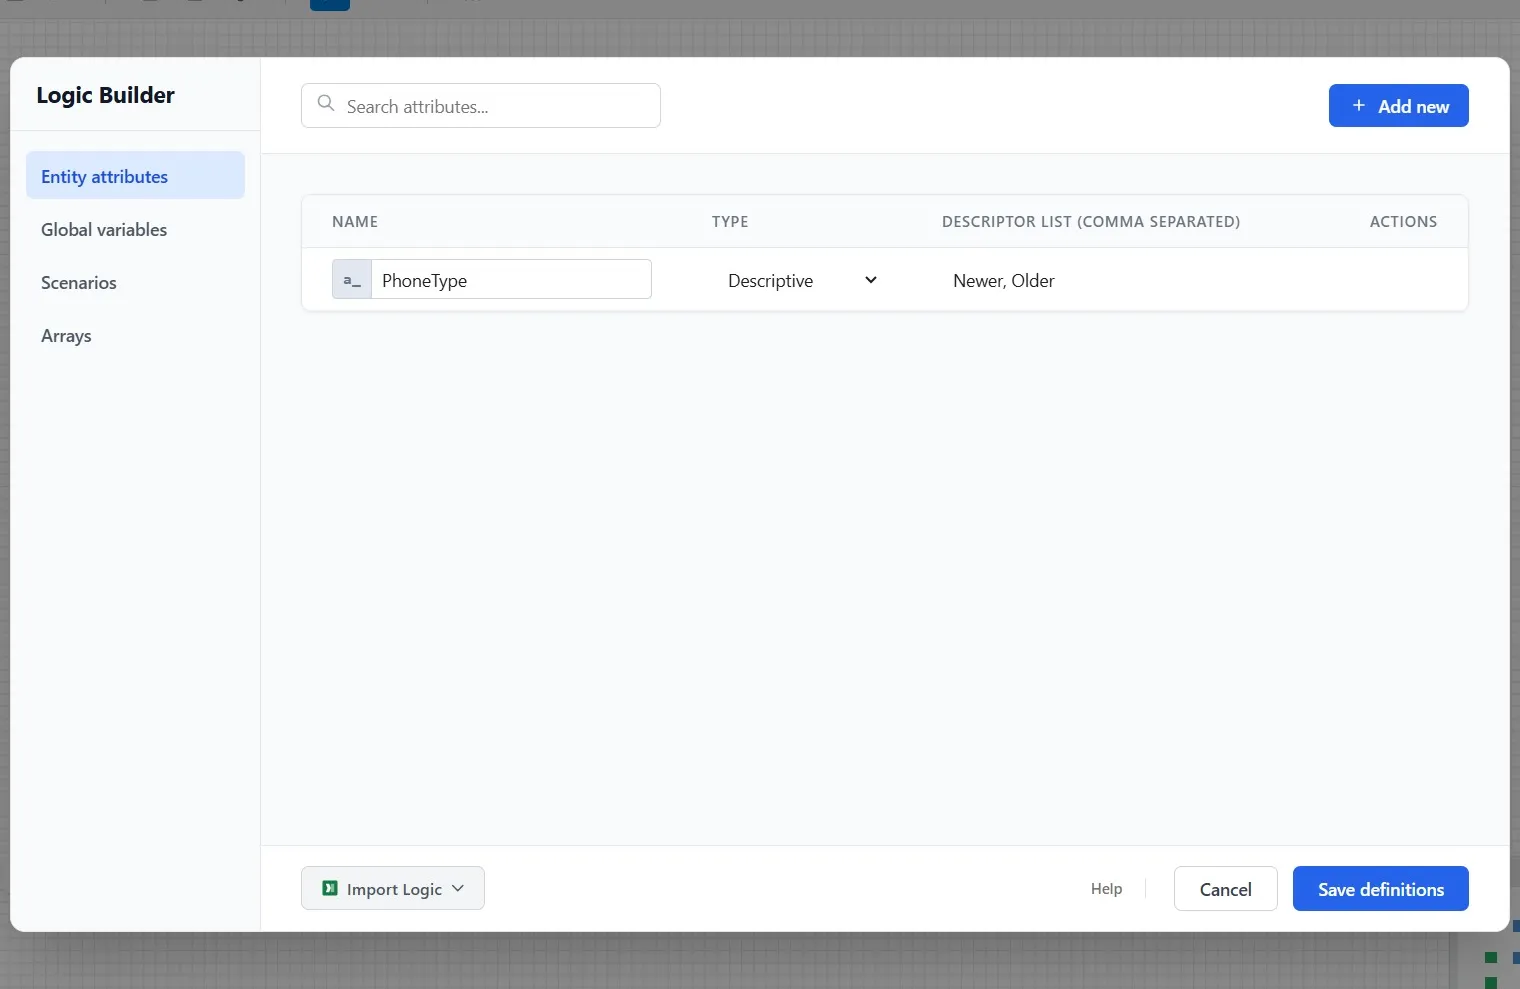
- On the toolbar, click Logic Builder. It opens on Entity attributes.
- Click Add new, and click in Name. The box shows the a_ prefix; type PhoneType after it.
- Set Type to Descriptive: its values are words, not numbers.
- Click Descriptor List and type Newer, Older: the values a phone type can take.
Step 3. Declare the variable
- Click Global variables, then Add new.
- Click in Name, after the v_ prefix, and type JobsDone. It is an Integer, starting at 0.
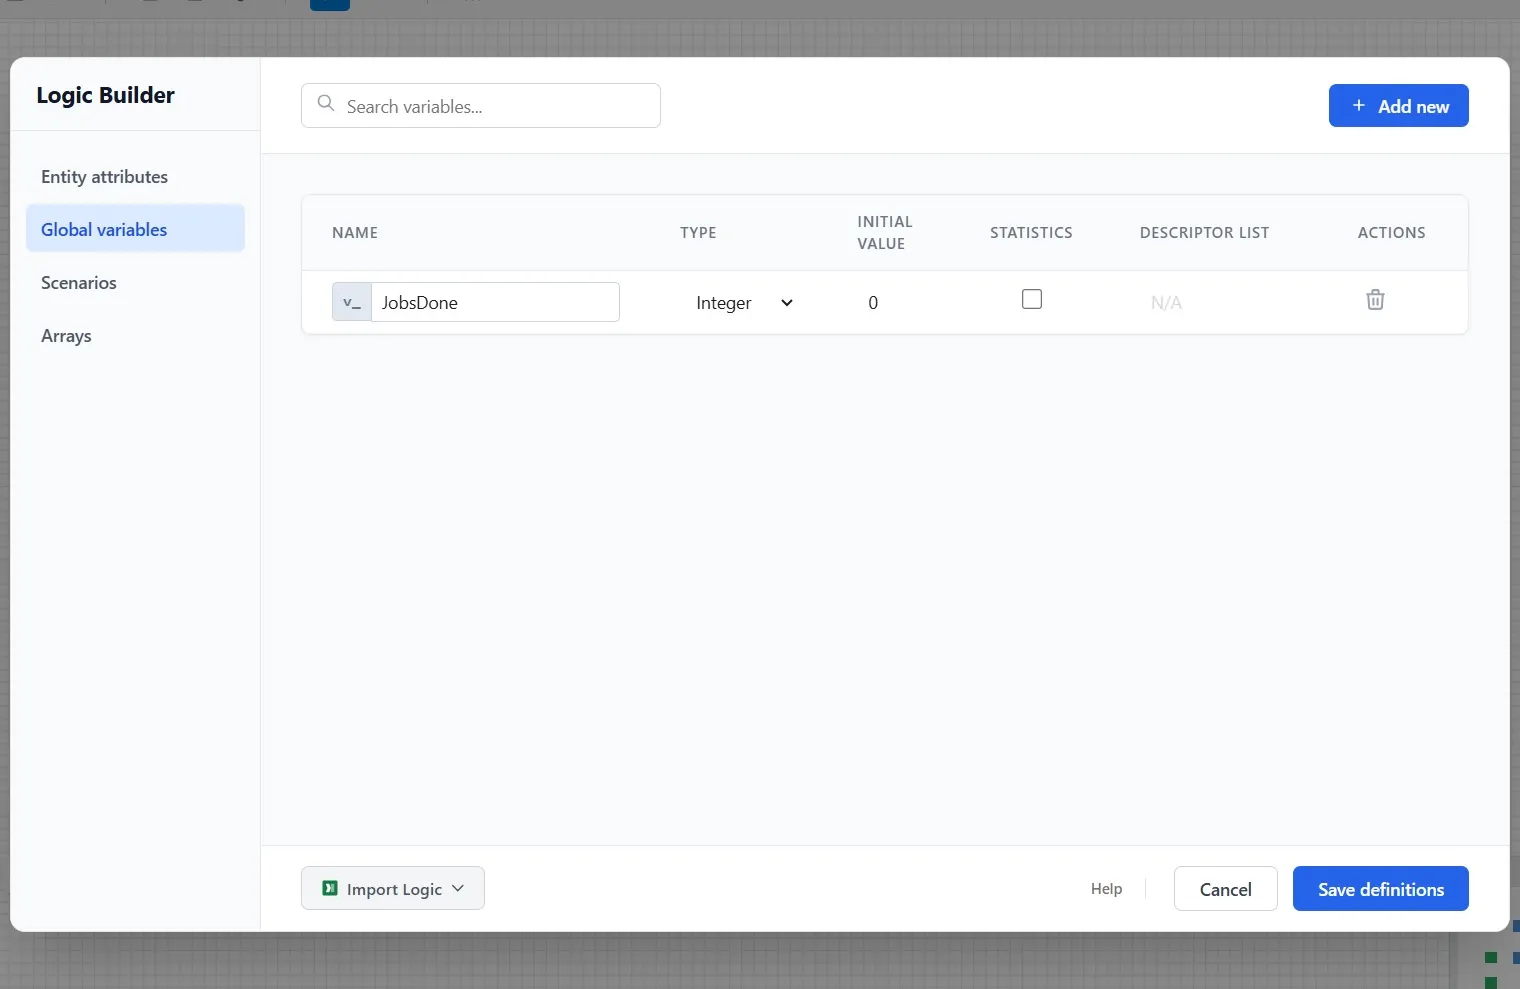
- Click Save definitions. Nothing is kept until you do.
Why one is an attribute and the other a variable: the phone type belongs to each customer, so it must travel with them. The job count belongs to the shop, so there is only one.
Step 4. Give each customer a phone type at Check In
- Click Check In and open its Logic tab.
- Click Compose. The Action Logic Builder opens. It builds the logic from cards, so you do not need to remember how to write it.
- Click Add Action, search for SET Attribute, and pick it.
- Choose a_PhoneType from its list.
- Click the value box and type D2(80, “Newer”, 20, “Older”), with the words in quotes.
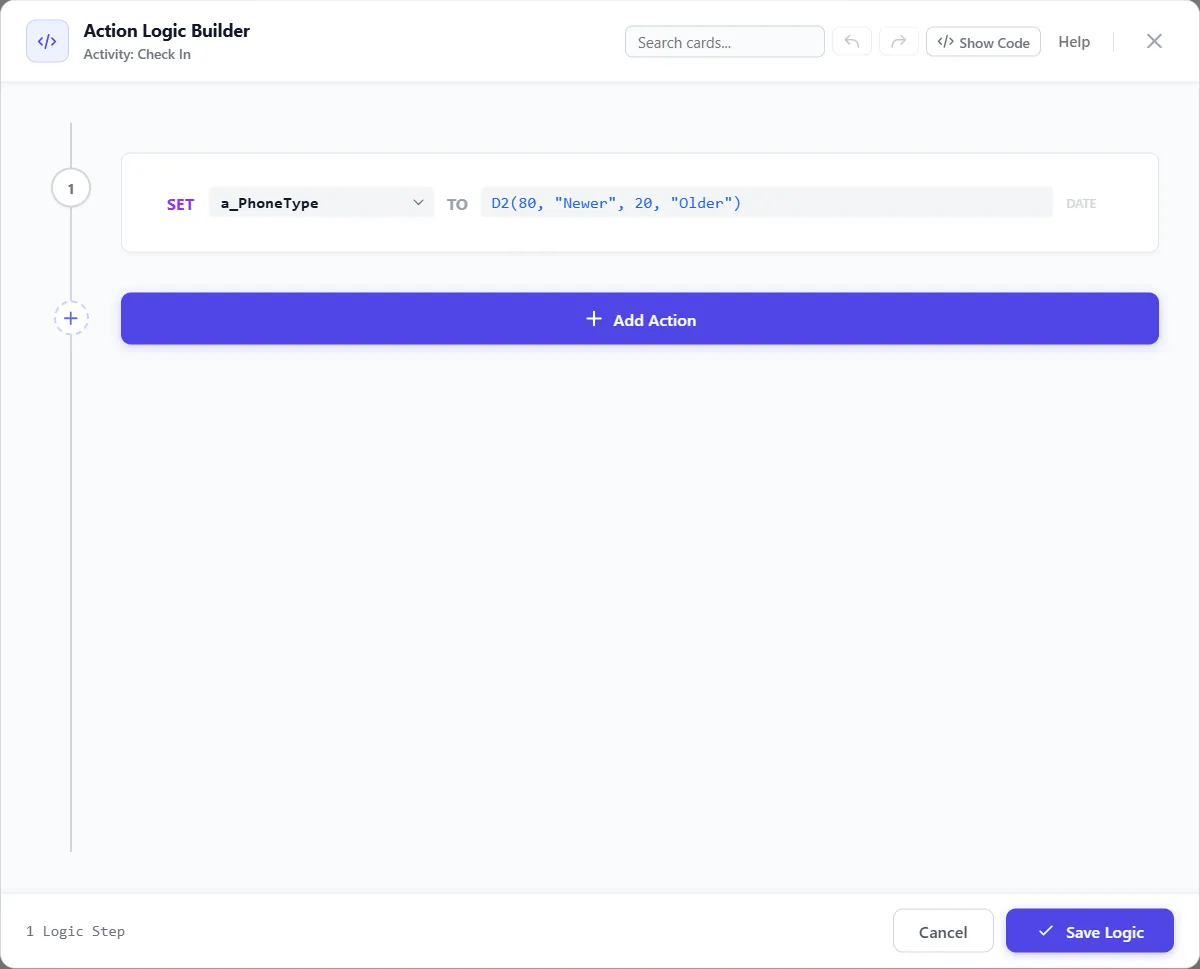
D2 picks one of two values by percent: 80 percent of customers get “Newer” and 20 percent get “Older”. The percents must add up to 100, which the app checks as you type.
- Click Save Logic. The Logic tab now shows the line the card wrote:
SET a_PhoneType TO D2(80, "Newer", 20, "Older").
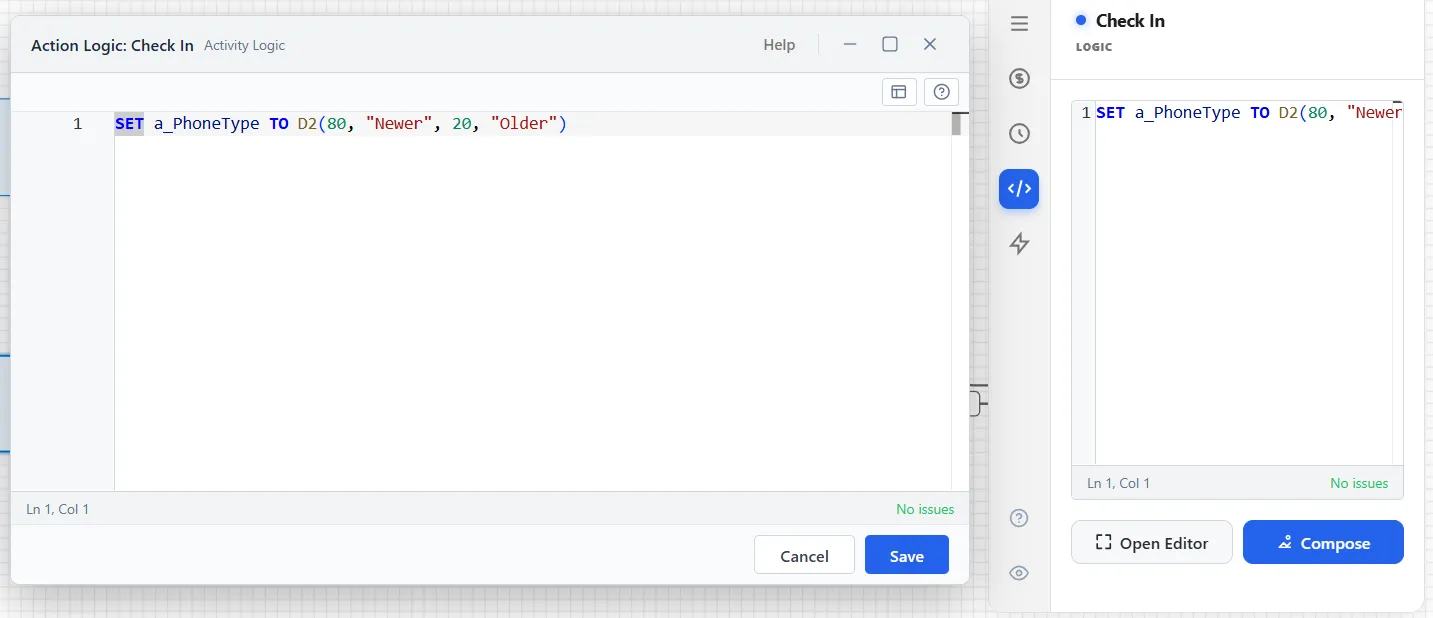
Every customer who passes Check In now carries its own phone type, drawn at random.
Step 5. Route older phones straight to the Repair Queue
The route from Check In to the Repair Queue already sends the office customers there by a condition. Add a second condition, so it also takes any customer with an Older phone.
- Click the route from Check In to the Repair Queue and open its General tab. Its condition reads Entity Name equals Office Customer.
- Click Add Condition. Set the new row’s Type to Attribute, choose a_PhoneType, and type Older.
- Click ANY (OR). The line above the rows now reads IF ANY of these are true.
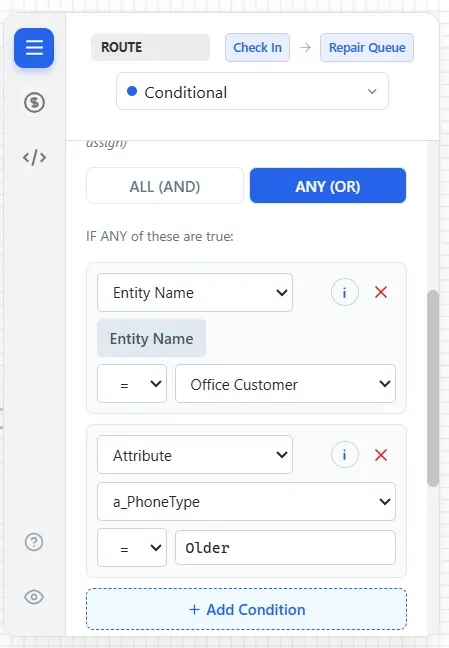
ALL or ANY matters. With ALL (AND), a customer would need to be an office customer and have an Older phone. With ANY (OR), either one is enough. This route now takes the office customers, or any customer whose phone type is Older. Everyone else still takes the catch-all to Quick Fix.
Step 6. Count the jobs at Pick Up
Every customer leaves through Pick Up, so it is the place to count.
- Click Pick Up, open its Logic tab, and click Compose.
- Click Add Action, search for INC Variable, and pick it. Choose v_JobsDone; by shows 1. Each customer now adds 1 to the count.
- Click Add Action again, search for If, and pick it. For its condition, type v_JobsDone = 30.
- Inside the If card, click its own Add Action and pick DISPLAY. Click the message box and type {v_JobsDone} jobs done. The braces put the count’s live value into the message.
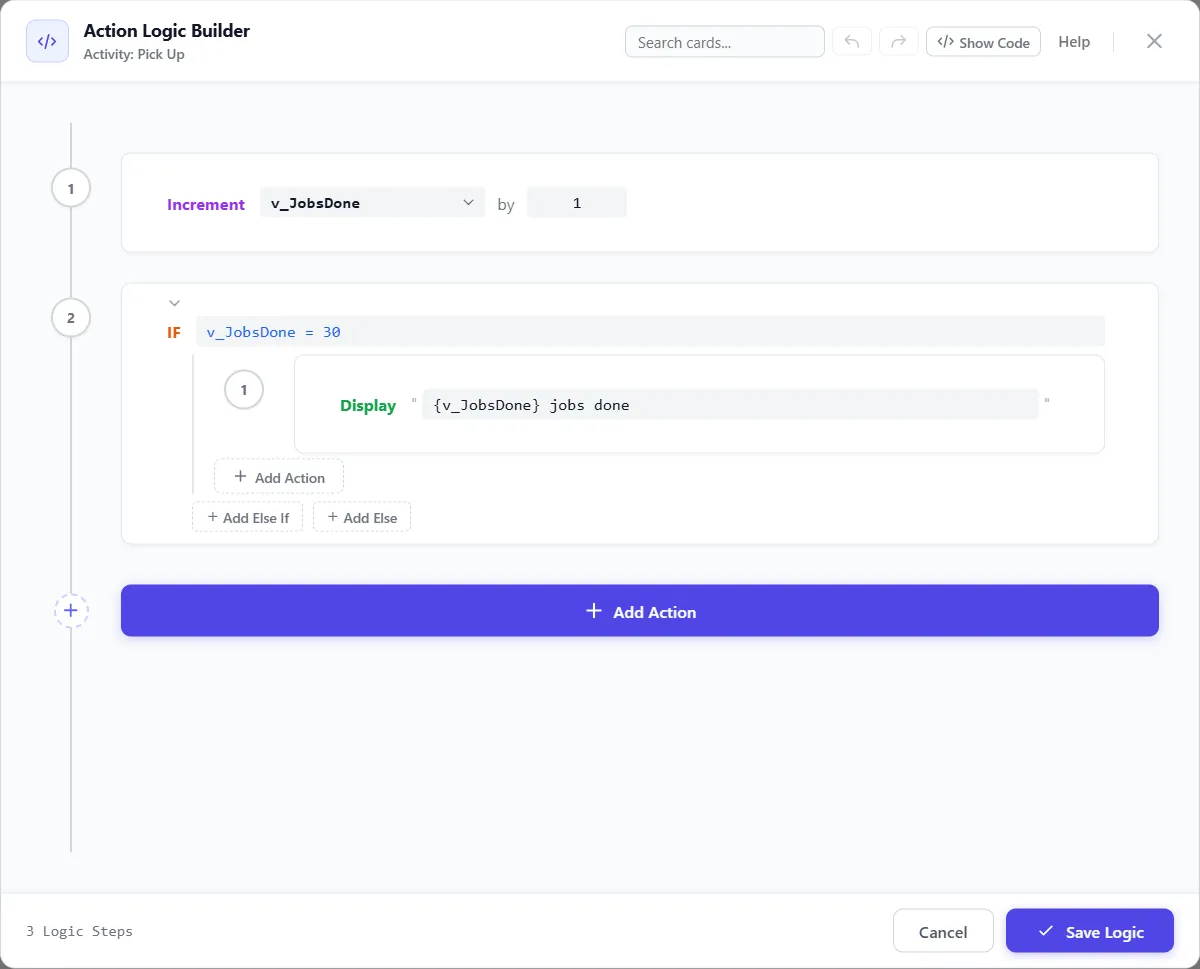
- Click Save Logic.
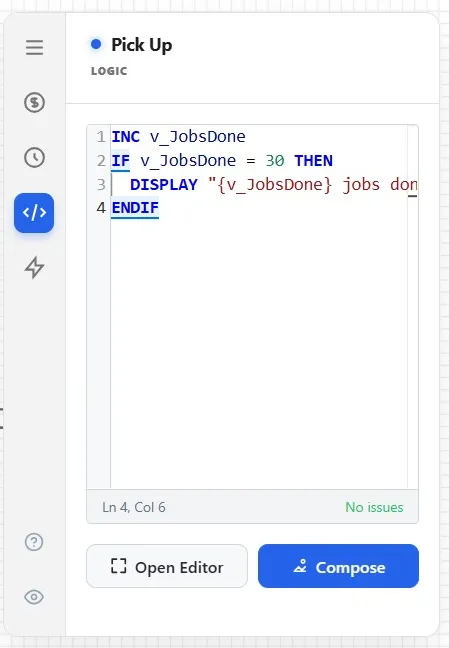
What you should see: four lines in the Logic tab. Reading them is worth a moment, because this is what logic looks like everywhere in ProcessModel: raise the count; if it has reached 30, show the message; end of the if.
Step 7. Watch the logic work
- Click Run Simulation, and watch Check In from 7.
At 7:06, a walk-in leaves Check In straight for the Repair Queue, and the label over Check In reads Condition, Repair Queue. Before 10 only walk-ins arrive, so every customer on that route has an Older phone: the attribute at work.
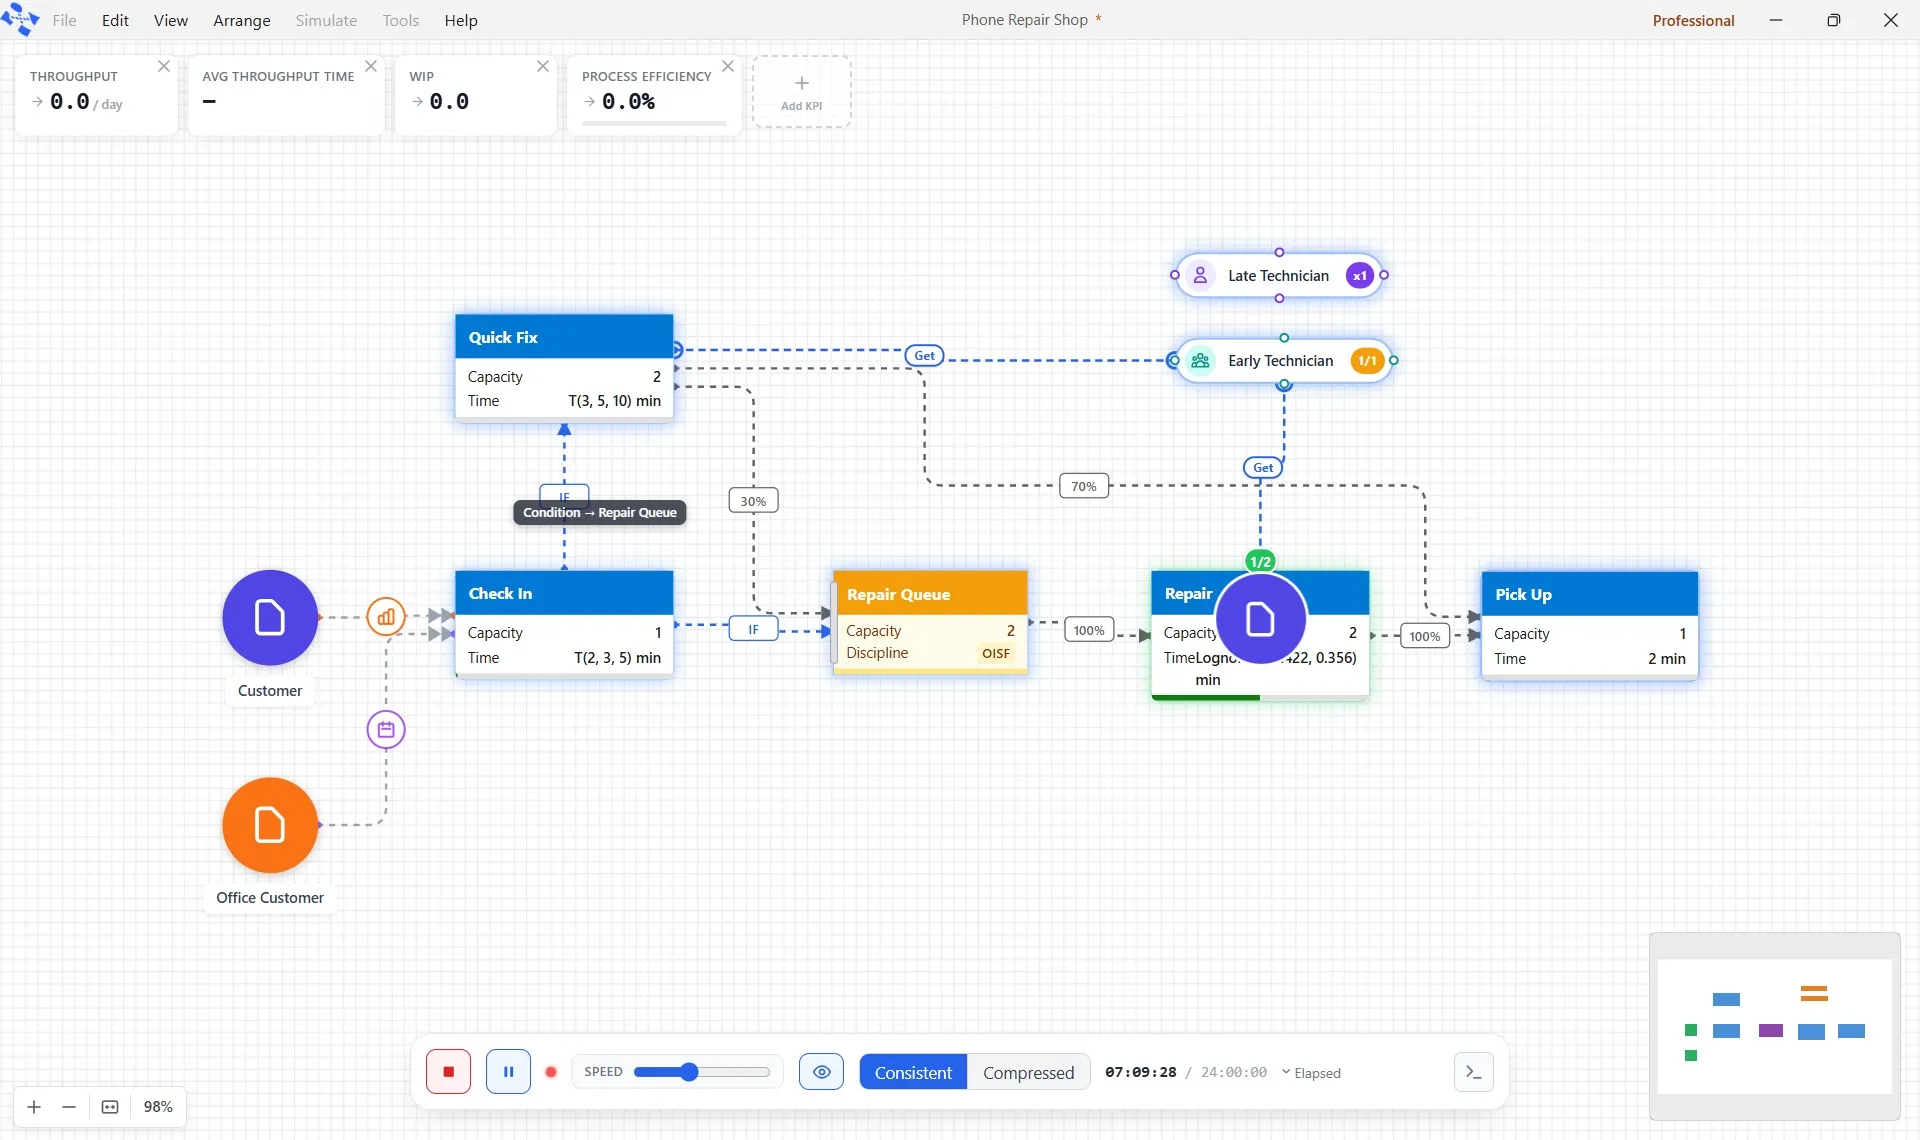
At 10 the office sends twelve, and they take the same route. Just before 1, the 30th customer leaves Pick Up, the count reaches 30, and the run stops on a Simulation Message.
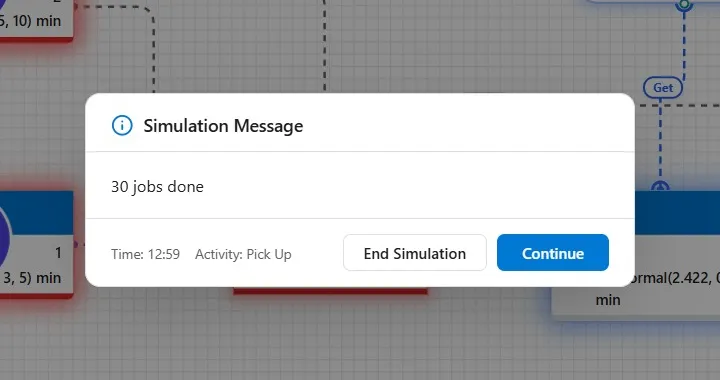
The message names the time and the step that showed it. The run holds until you click Continue (or End Simulation). Click Continue, and the day goes on.
Step 8. Read the cards
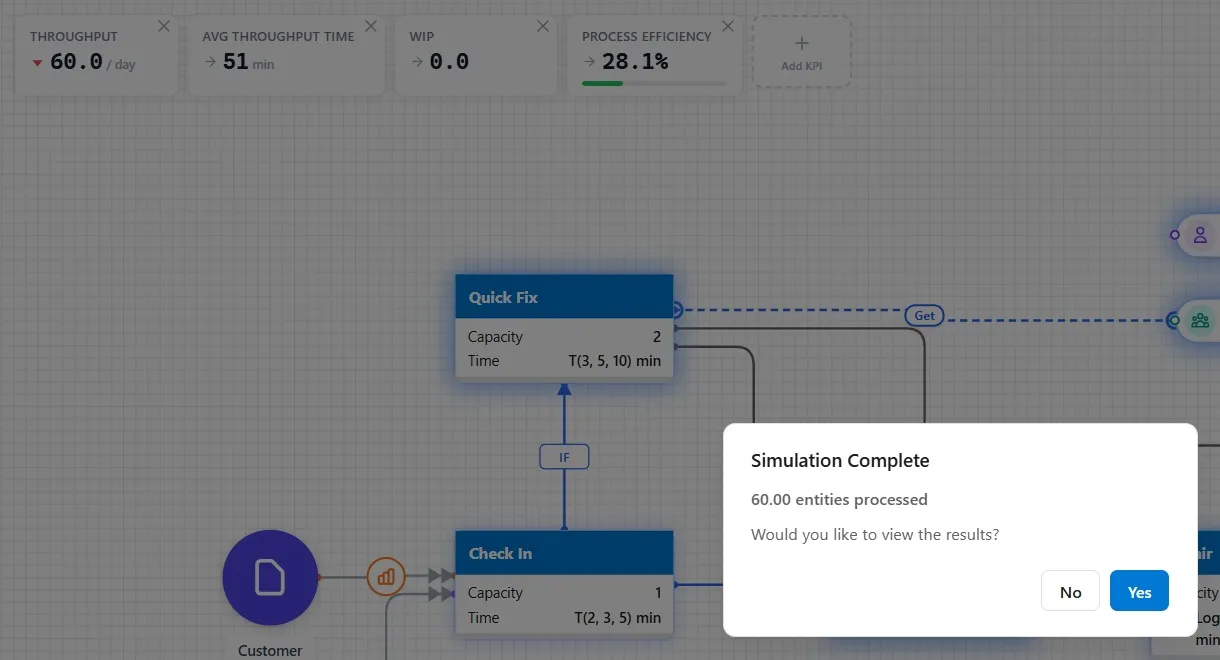
- 60 went through.
- Avg Throughput Time, 51 minutes, as in Chapter 7.
- WIP, 0: at midnight the shop is empty.
- Process Efficiency, 28.1%, up from 27.4%: a slightly larger share of each customer’s time is spent being worked on.
The numbers barely moved, and that is a lesson too: this chapter changed who goes where, not how much work there is. The bigger gain is that the model now knows each customer’s phone and the day’s count, which later chapters build on. One run, one possible Monday. Click No.
Step 9. Save it
- Click File, then Save. The star leaves the title bar. Chapter 9 starts from this shop.
Your practice model
- Start fromChapter 7. Give Your Technicians Real Working HoursThe shop as Chapter 7 left it. Use your own saved Phone Repair Shop instead if you built it.
- Compare withChapter 8. Tag Each Customer and Count the JobsThe shop as this chapter leaves it. Open it when you are done, and check your settings against it.
Both are in File ▸ Demo Models, in the Self Teach Guide group. A demo model opens as a new model, so the original never changes.
Check yourself
Try it yourself
Count something else: how many customers with an Older phone come in a day.
- In the Logic Builder, on Global variables, add v_OlderPhones, an Integer starting at 0, and click Save definitions.
- On Check In’s Logic tab, click Compose, and under the SET card add an If with the condition a_PhoneType = “Older”. Inside it, add INC Variable for v_OlderPhones. Click Save Logic.
- To see the count, open Pick Up’s Logic tab, click Compose, and change the DISPLAY message to {v_JobsDone} jobs done, {v_OlderPhones} older phones. Click Save Logic.
Mark it done
When you can say when to use an attribute and when a variable, turn on Done.
You watched this chapter's video.Not watched yet: the video is marked when it plays to the end.
Kept in this browser only, and shown on the course page.