

ProcessModel 7 Self Teach GuideChapter 6
Chapter 6. Give Each Line a Size and an Order
By the end of this chapter you can
Set how much a step holds and who in a line goes first.
Before you start
So far, a customer waiting for Repair joined a line with no end: Repair’s own waiting room could hold 999 people. No real shop has a waiting room like that. A bench holds a few people; a counter has room for a few phones. And every waiting area has an order: who goes next when a Technician is free.
Both matter, and in a way that surprises people the first time. When a waiting area is full, the customer who has finished the step before it has nowhere to go. They stay where they are, and the step they are standing in cannot take anyone new. A full line downstream stops work upstream. This is called blocking, and it is how a small bottleneck in one place causes a long line somewhere else.
In this chapter you give the shop’s repair line a size and an order, then watch blocking happen. Two settings carry the whole lesson:
- Capacity of a waiting area: how many can wait there.
- Queue discipline: which waiting customer goes next.
Here is what changes in the shop:
| Part | Chapter 5 | Chapter 6 |
|---|---|---|
| The office group | Six customers at 10 on Monday | Twelve customers at 10 on Monday |
| Repair’s own waiting room | Input Q 999: a line with no end | Input Q 0: none |
| Repair Queue | None | A new waiting area before Repair, for two customers; the one longest in the shop goes first |
| Routes into Repair | From Check In and from Quick Fix | Both now end at the Repair Queue, which leads on to Repair |
| Steps, staff and run | As Chapter 5 left them | Unchanged; Technician, Repair and Pick Up move right to make room |
You need your Phone Repair Shop from Chapter 5 (or the practice model below) and about forty minutes.
Step 1. Open your shop
- On the Welcome screen, under Recent Models, click Phone Repair Shop.
What you should see: the shop as Chapter 5 left it, with Quick Fix and the orange Office Customer.
Step 2. Send twelve from the office
To see what a full line does, the shop needs a burst of work bigger than it can take at once. The office now sends twelve customers at 10.
- Click the office group’s arrival line, from Office Customer. It reads 1 entry, 6 entities.
- Click Open Schedule Builder. The row holds 6 customers at 10 on Monday morning.
- Click its Quantity and type 12. The foot reads Total Quantity 12.
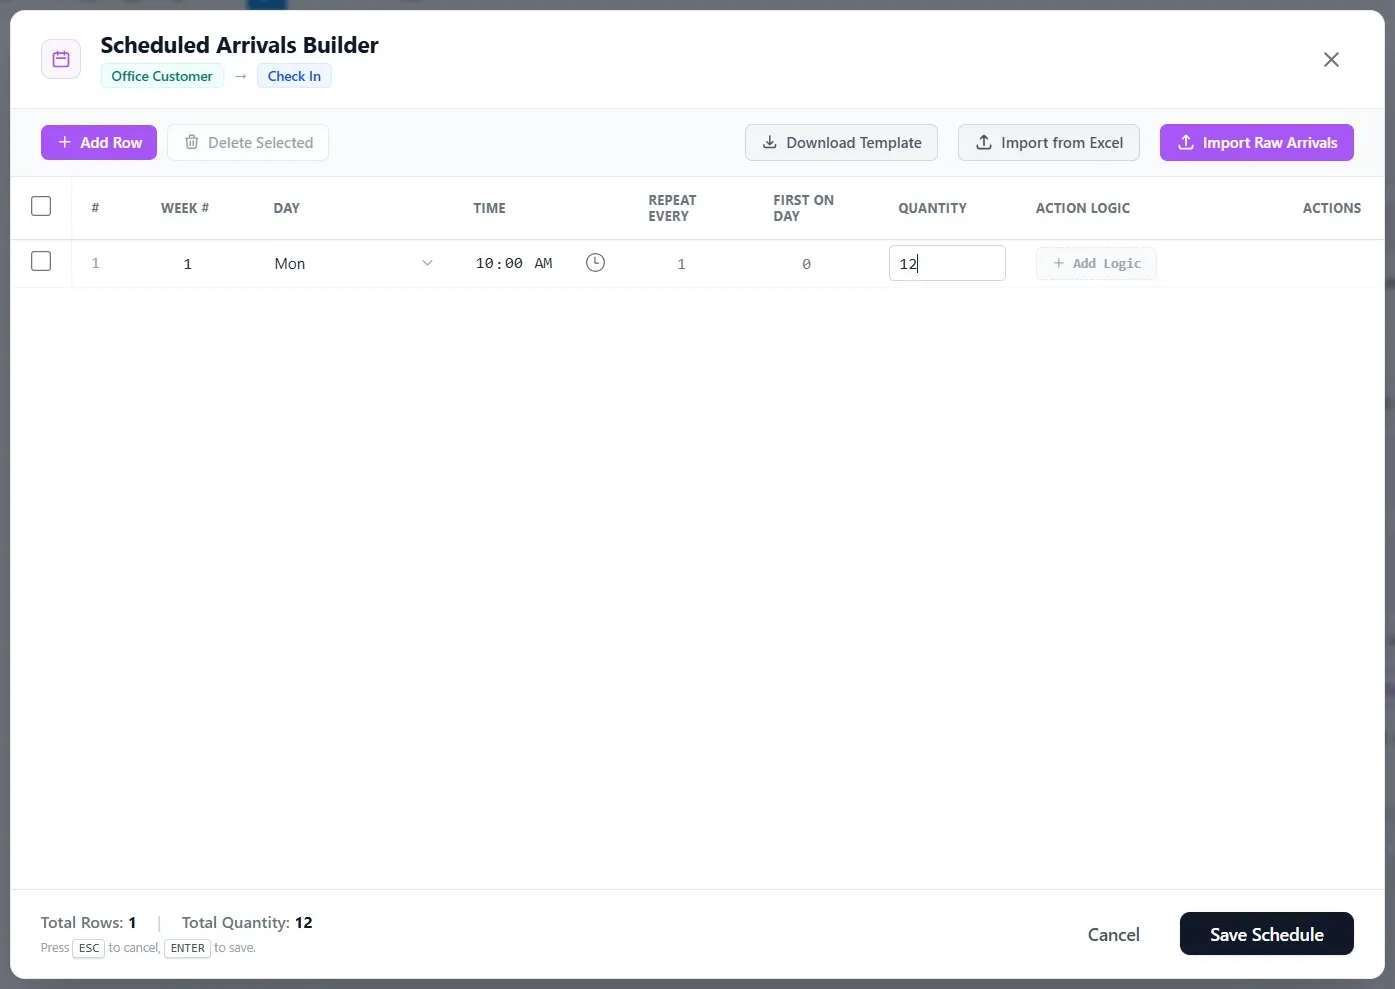
- Click Save Schedule. The panel now reads 1 entry, 12 entities.
Step 3. Take away Repair’s own waiting room
Every activity has three small boxes above its time: Input Q, Capacity and Output Q. Capacity is how many it works on at once. Input Q is its own waiting room in front of it, and Output Q is room after it for customers who are done but cannot move on yet. In both, 0 means none.
- Click Repair. Capacity reads 2: two repairs at once. Input Q reads 999: a line with no end.
- Click Input Q and type 0.
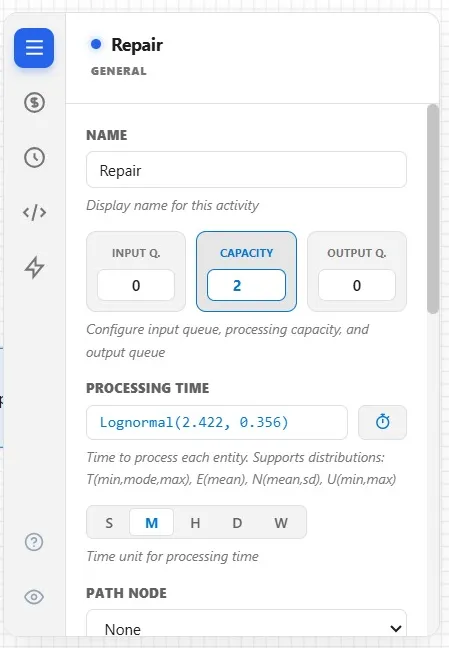
Why: you want one place, and only one, where customers wait for a repair. That place is the Repair Queue you add next, and you will give it a size and an order.
Step 4. Make room and add the Repair Queue
The Repair Queue goes where Repair stands now, so first move three shapes right.
- Click Technician, then hold Ctrl and click Repair and Pick Up. All three are selected.
- Drag them right together. Every line stays attached as they move.
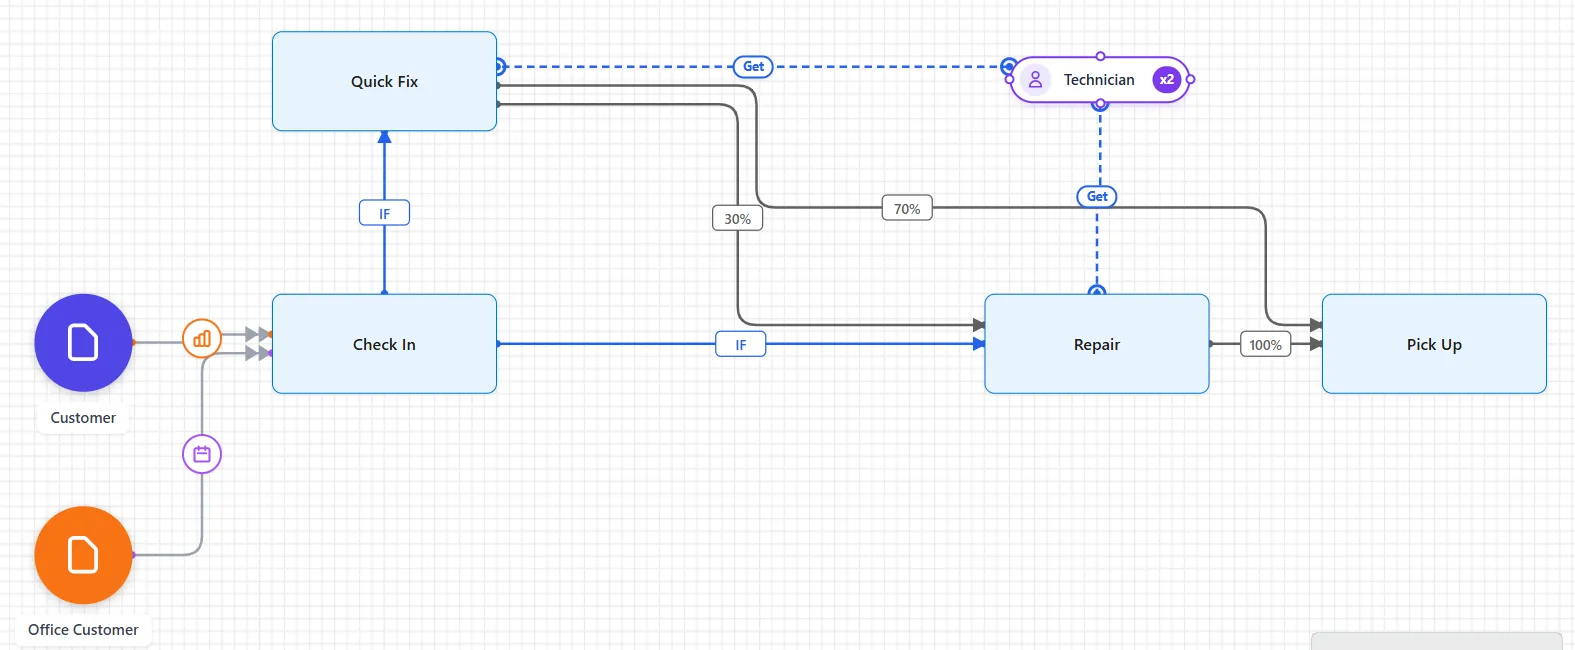
- Drag a Queue from the palette and drop it where Repair was, in line with Check In. A Queue is a waiting area: nothing is done to the customers there, they only wait.
- Name it Repair Queue.
- Click Capacity and type 2: the queue holds two customers.
- Click Queue Discipline and choose Oldest in System.
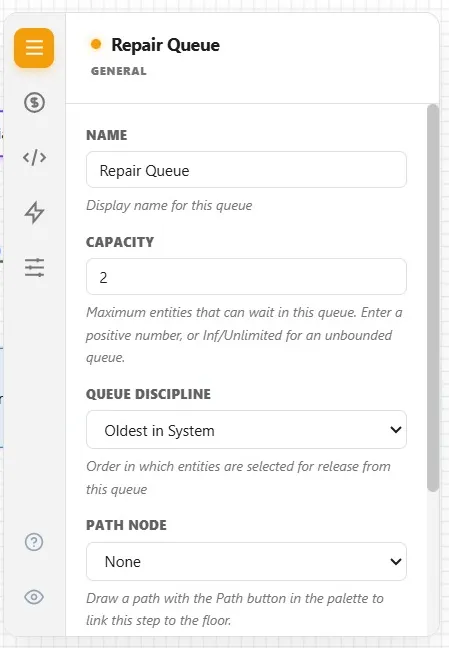
Queue discipline is the order. A queue that serves first come, first served is fair to the queue, but Oldest in System is fair to the customer: it looks at how long each one has been in the shop, not just in this line. A walk-in who already tried Quick Fix has been here longer than an office customer who just checked in, so they go first. The list offers other orders too, such as last in first out, random, or by an attribute (Chapter 8 teaches attributes).
- Scroll down to Animation Display and tick Show queue fill indicator.
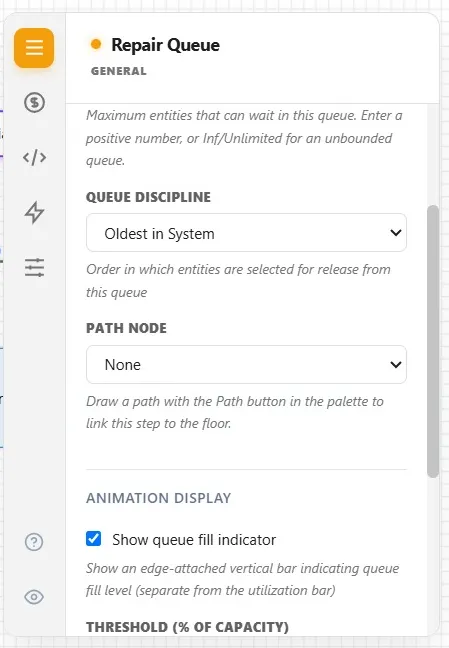
During the run, a bar on the queue’s edge will show how full it is, so you can see the moment it fills.
Step 5. Send every repair through the queue
Now the two routes that went into Repair must end at the Repair Queue instead.
- Click the office route, from Check In to Repair. Drag its end off Repair and drop it on the Repair Queue. Its panel stays open: it is still Conditional, Priority 1, and scrolling down shows the condition is kept, IF Entity.Name equals “Office Customer”.
- Click Quick Fix’s route to Repair and drag its end onto the Repair Queue too. It is still Percent, with Probability 30.
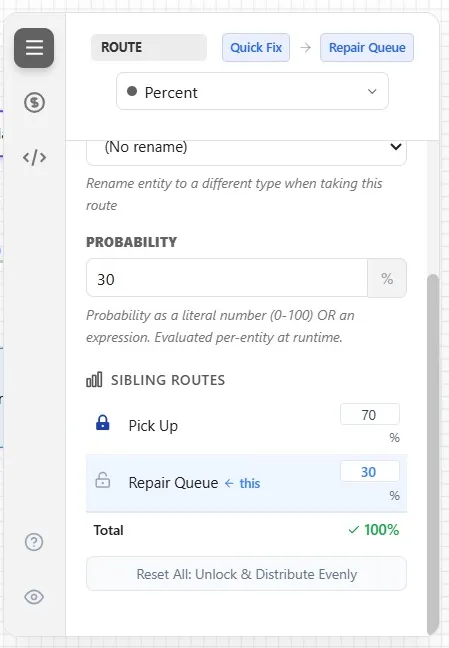
Moving a route’s end keeps everything you set on it. You do not have to build the condition or the percentages again.
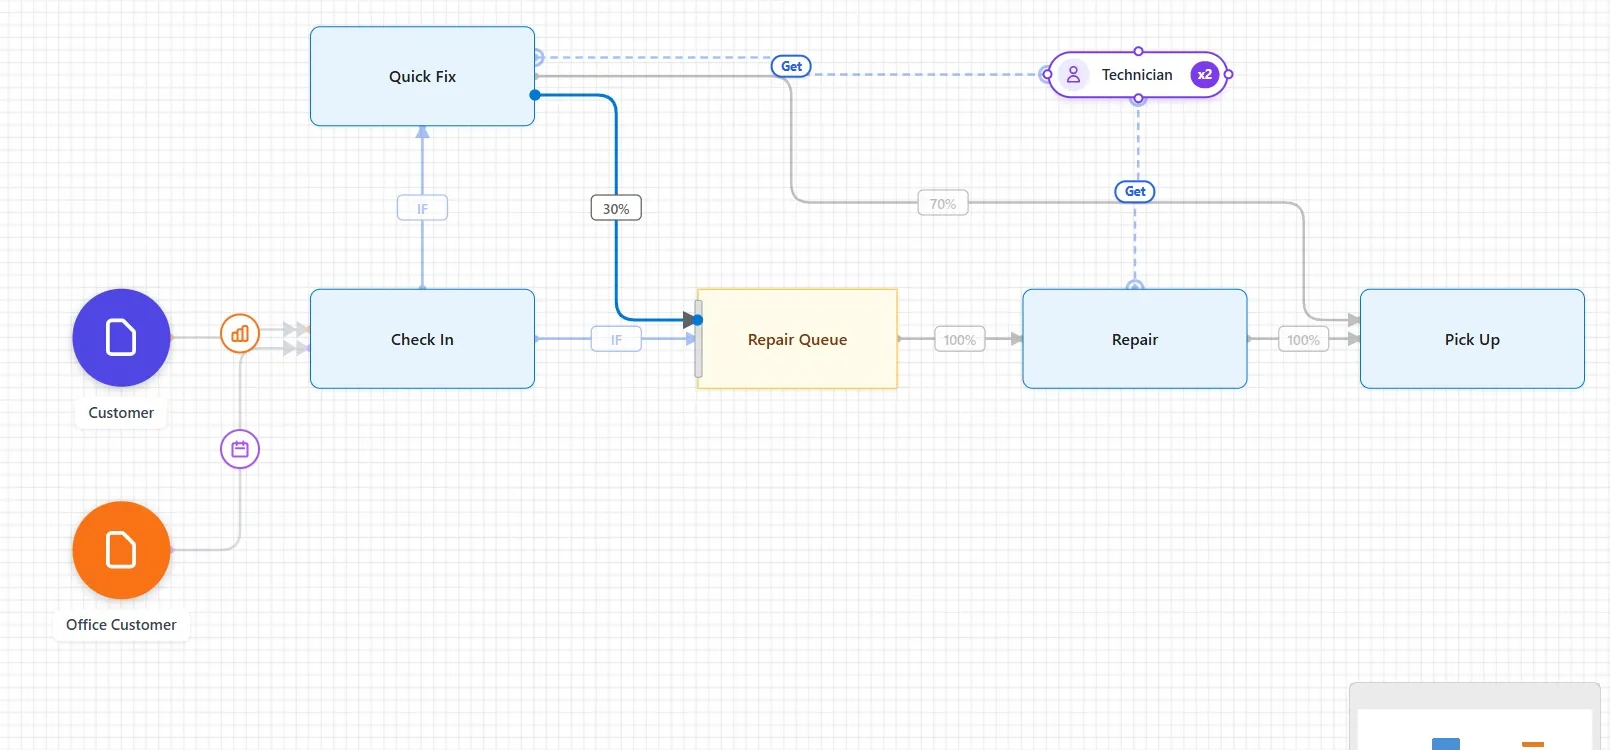
- Draw a line from Repair Queue to Repair. It reads 100%: every customer in the queue goes on to Repair.
Step 6. Watch the queue fill and Check In stop
- Click Run Simulation.
Until 10, the day goes as in Chapter 5. At 10, the office sends twelve customers at once, and here is the chain to watch, link by link:
- Check In serves one customer at a time, and each office customer goes on to the Repair Queue.
- Repair works on two. The Repair Queue holds two more. That is four office customers in the repair area.
- The next one finishes Check In and has nowhere to go: the queue is full, and Repair has no waiting room of its own. So they stay at Check In.
- While they stay, Check In cannot take anyone new. Check In’s line grows.
Watch the bar on the queue’s edge: yellow with one customer, then red and pulsing with two. Rest the pointer on Check In: its popup reads Blocked.
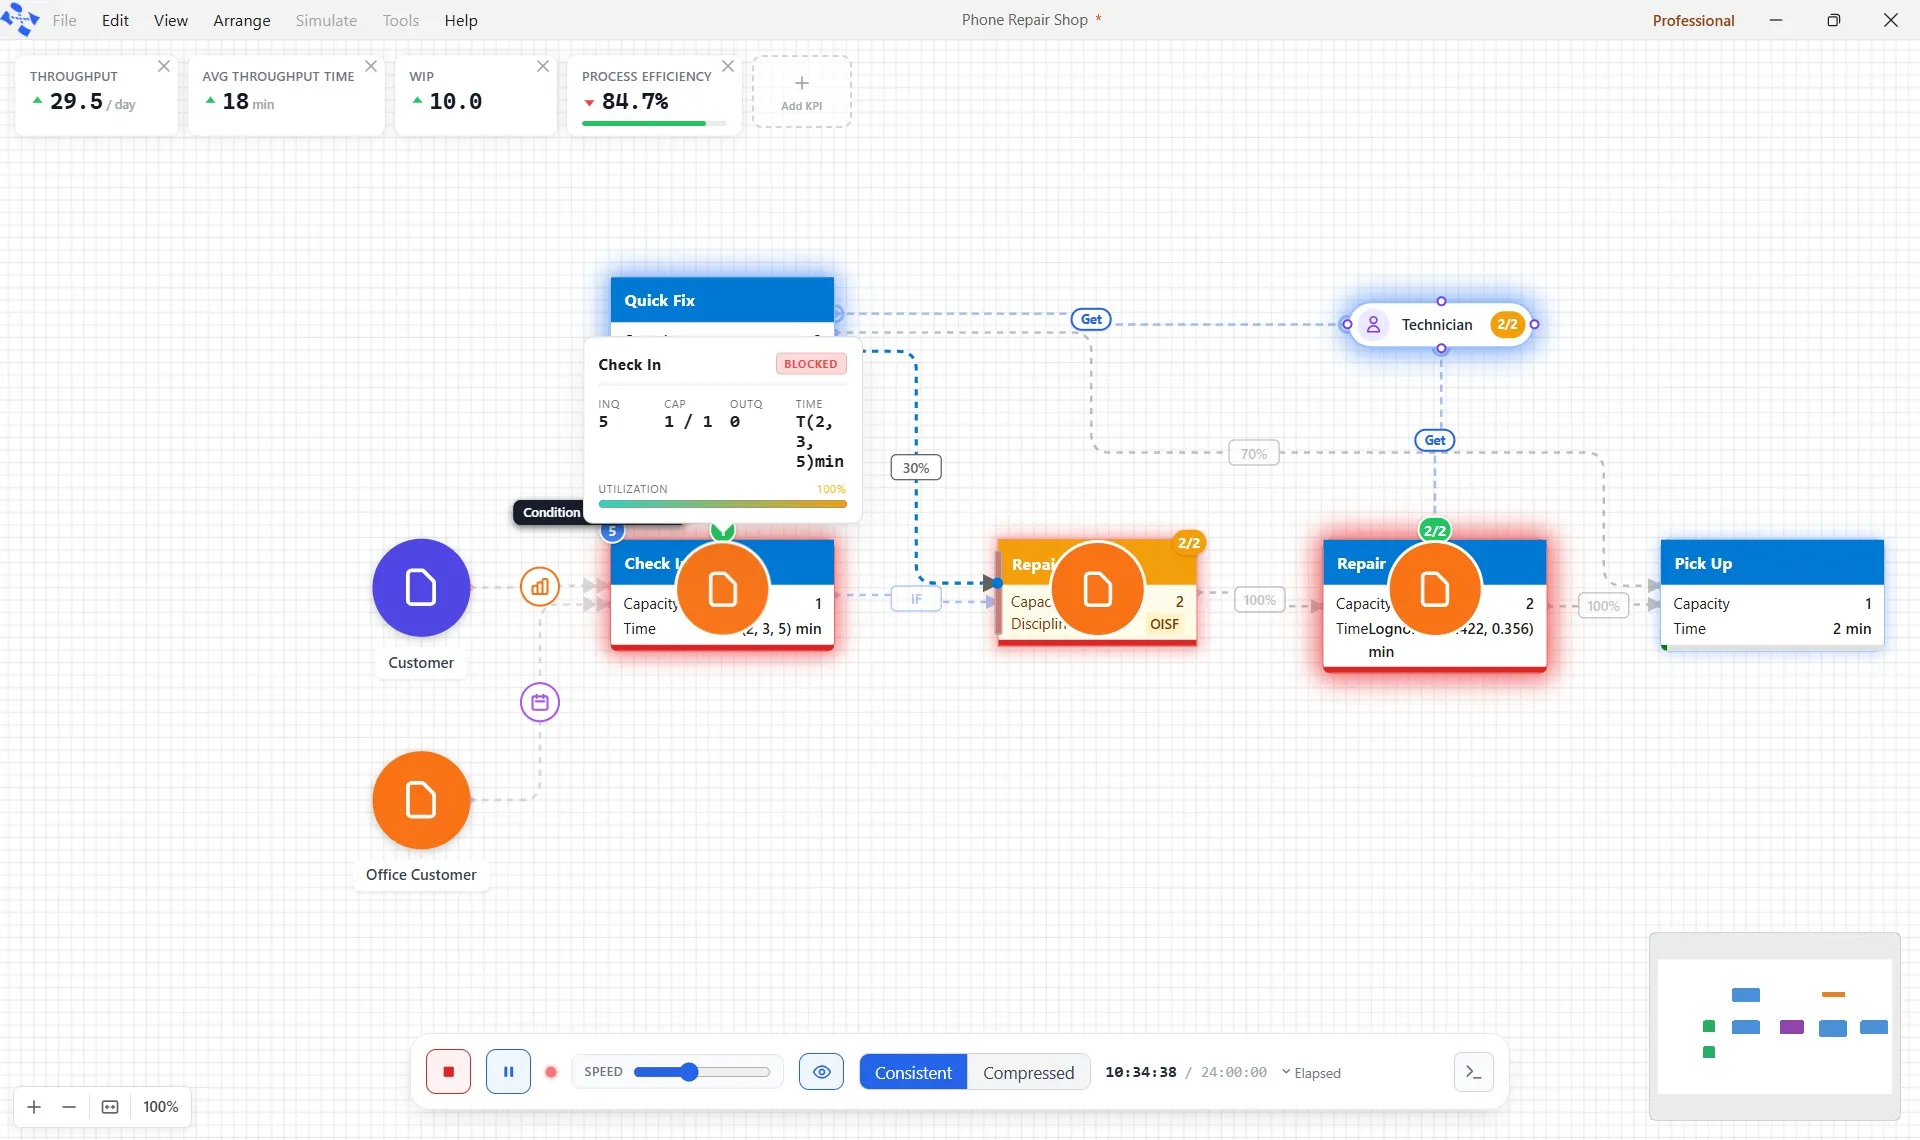
When a repair ends, the queue moves up, the customer at Check In moves into it, and Check In starts again. Soon after 11 its line is gone, and then the queue empties.
At noon, the walk-ins’ rush comes, and the queue’s order shows its worth: a walk-in who tried Quick Fix has usually been in the shop longest, so they move up ahead. The afternoon is calmer, and the queue does not fill again.
Step 7. Read the cards
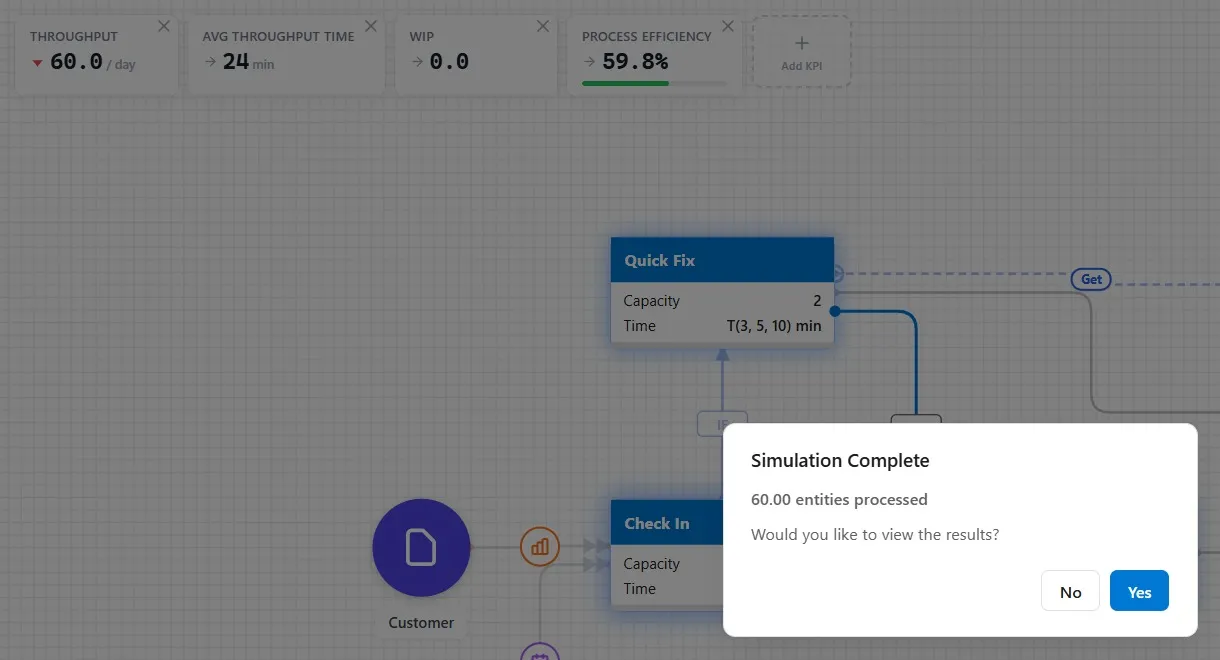
- 60 went through: the 48 walk-ins and the 12 from the office.
- Avg Throughput Time, 24 minutes, up from 20 in Chapter 5: twelve customers at once means more waiting.
- WIP, 0: at midnight the shop is empty.
- Process Efficiency, 59.8%: more of each customer’s time is spent waiting.
The small arrows on the cards compare with the run’s last hour, not with Chapter 5, so compare chapters by the numbers themselves. As always, one run is one possible Monday; Chapter 10 runs many. Click No.
Step 8. Save it
- Click File, then Save. The star leaves the title bar. Chapter 7 starts from this shop.
Your practice model
- Start fromChapter 5. Send Each Job Down the Right PathThe shop as Chapter 5 left it. Use your own saved Phone Repair Shop instead if you built it.
- Compare withChapter 6. Give Each Line a Size and an OrderThe shop as this chapter leaves it. Open it when you are done, and check your settings against it.
Both are in File ▸ Demo Models, in the Self Teach Guide group. A demo model opens as a new model, so the original never changes.
Check yourself
Try it yourself
How big should the queue be? Make it bigger and find out.
- Click the Repair Queue and set its Capacity to 6.
- Run the day. At 10, rest the pointer on Check In while the office group comes through.
Mark it done
When you can explain why a full Repair Queue stops Check In, turn on Done.
You watched this chapter's video.Not watched yet: the video is marked when it plays to the end.
Kept in this browser only, and shown on the course page.