

ProcessModel 7 Self Teach GuideChapter 2
Chapter 2. Your First Model
By the end of this chapter you can
Build a model from an empty canvas, run it and save it.
Before you start
In this chapter you build your first model from nothing: a small phone repair shop. It is the model the whole course grows, so take your time with it and save it at the end. Chapter 3 starts from the shop you save here.
Every process model answers the same three questions, and you will answer each of them in turn:
- What flows through the process? Here, customers, each with a phone to fix.
- What happens to them, step by step, and how long does each step take?
- Who or what does the work? Here, a Technician.
Here is the shop you will build. Read it now, because every number you type comes from this list.
| Part | Set to |
|---|---|
| Customers | One walks in every 10 minutes |
| Check In | 3 minutes at the counter screen, with no staff |
| Repair | 12 minutes, done by a Technician |
| Pick Up | 2 minutes at the counter screen, with no staff |
| Staff | One Technician |
| The run | One shop day, 8 hours, run once so you can watch it |
Look at the numbers before you build anything. A customer arrives every 10 minutes, but Repair takes 12. What do you expect will happen during the day? Keep your guess in mind: the run will tell you whether you were right.
You need about thirty minutes. The times in this chapter are fixed on purpose, so the model is easy to follow. Chapter 3 makes them vary, as real work does.
Step 1. Start with an empty canvas
- Start ProcessModel. On the Welcome screen, under Start New Model, click Blank Canvas.
What you should see: an empty canvas, and down its left side, the palette.
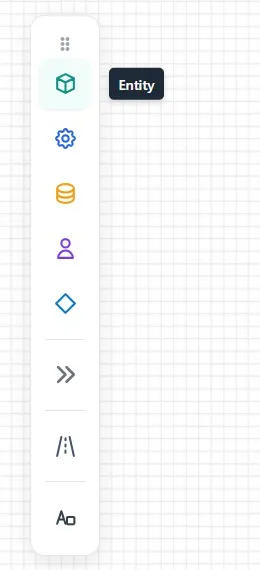
- Rest the pointer on the first shape in the palette. Its name shows beside it: Entity. Do the same down the column and you meet Activity, Queue, Resource and the others.
Step 2. Add the customer
An entity is whatever flows through a process: a patient, an order, a call. In this shop it is a customer with a phone to fix.
- Drag the Entity button from the palette onto the canvas, near the left. Its properties open on the right.
- Click in Name, select what is there, and type Customer.
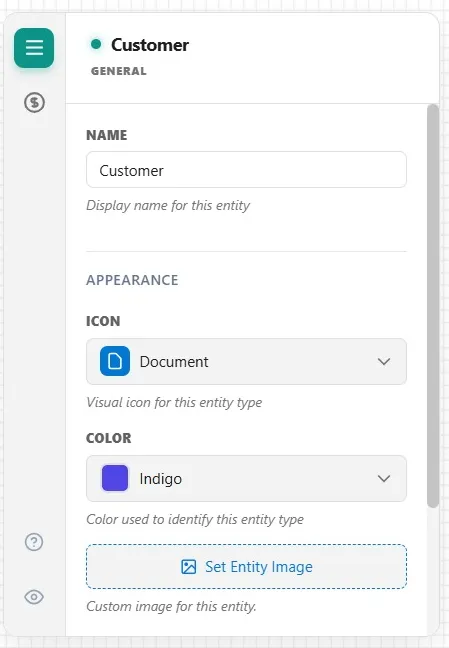
What you should see: a round shape on the canvas labeled Customer.
Step 3. Add the three steps
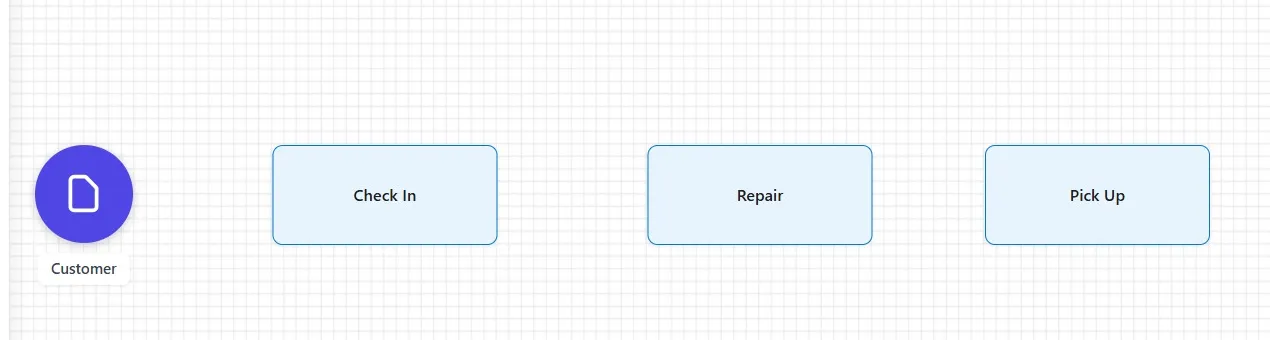
Each step a customer goes through is an activity: a place where something is done to the entity and time passes. The shop has three: Check In, Repair and Pick Up.
- Drag an Activity onto the canvas, to the right of Customer, and name it Check In.
- Find Processing Time: how long one customer spends at this step. Type 3.
- Look at the unit row under it: S, M, H, D, W, for seconds, minutes, hours, days and weeks. M is already chosen, so 3 means 3 minutes. Click M anyway, to make it your habit to check the unit every time you type a time.
- Click an empty part of the canvas to close the panel.
- Drag a second Activity to the right of Check In. Name it Repair, type 12 in Processing Time, and check that M is chosen.
- Drag a third Activity to the right of Repair. Name it Pick Up, with 2 minutes.
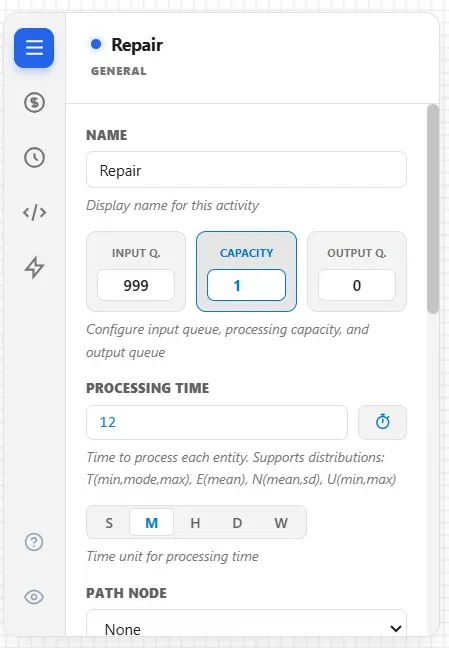
Notice Capacity above Processing Time. It reads 1: Repair can work on one customer at a time. You will come back to it at the end of the chapter.
Step 4. Draw how customers arrive
Shapes on their own do nothing. The lines between them carry the customers, and the first line, from the entity to its first step, is special: it is the arrival, and it says how and when customers come in.
- Rest the pointer on Customer until small handles show on its edge. Drag from the right-hand handle to Check In, and let go.
What you should see: a line from Customer to Check In, with a small clock badge on it.
- Click the line. Its properties open.
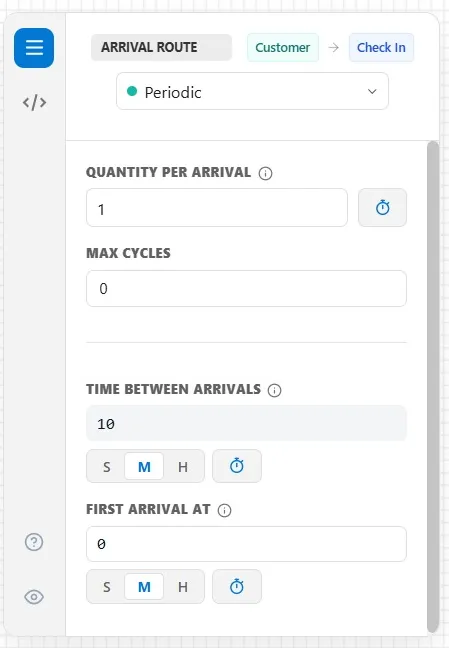
- Open the type list at the top. It holds several kinds of arrival; Chapter 4 uses two more of them. Choose Periodic: customers come in at a steady interval.
- Read the settings. Quantity per arrival is 1: one customer each time. Time between arrivals already reads 10, and M is already chosen. So a customer walks in every 10 minutes. The defaults are exactly what the shop needs, so there is nothing to type.
- Click an empty part of the canvas.
Step 5. Draw the routes
A route carries a customer from one step to the next.
- Drag from Check In’s right-hand handle to Repair.
- Drag from Repair’s right-hand handle to Pick Up.
What you should see: each new line carries a small label reading 100%: every customer goes on to the next step. Chapter 5 splits a route into several paths with different shares.
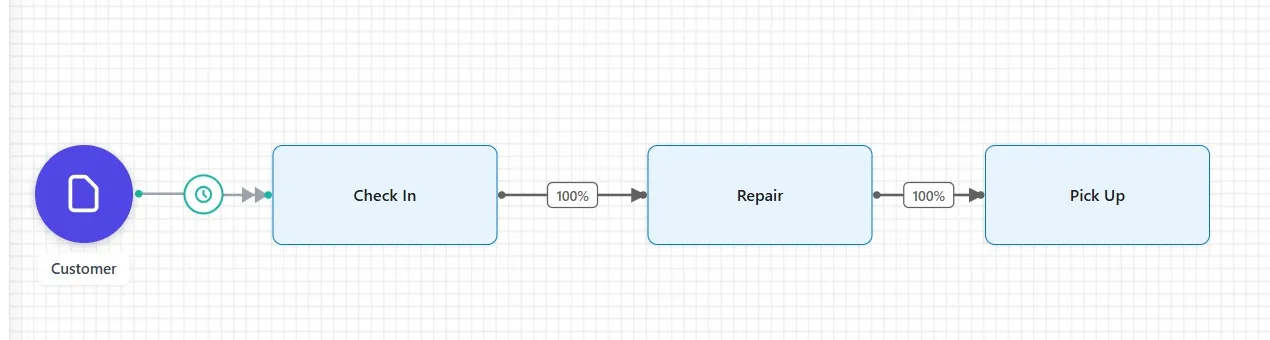
Nothing is drawn after Pick Up, and nothing needs to be. A customer who finishes the last step leaves the model there and is counted as done.
Step 6. Add the Technician
Check In and Pick Up happen at a counter screen with no staff, so they only take time. Repair needs a person. A resource is whoever (or whatever) a step needs in order to work: a person, a machine, a room.
- Drag a Resource onto the canvas, above Repair. Name it Technician. Its Quantity reads 1: there is one Technician. Click the empty canvas.
- Drag from the Technician’s bottom handle down to Repair.
What you should see: a dashed line from Technician to Repair, with a small Get label. A dashed line means “this step needs this resource”.
- Click the dashed line and read its properties.
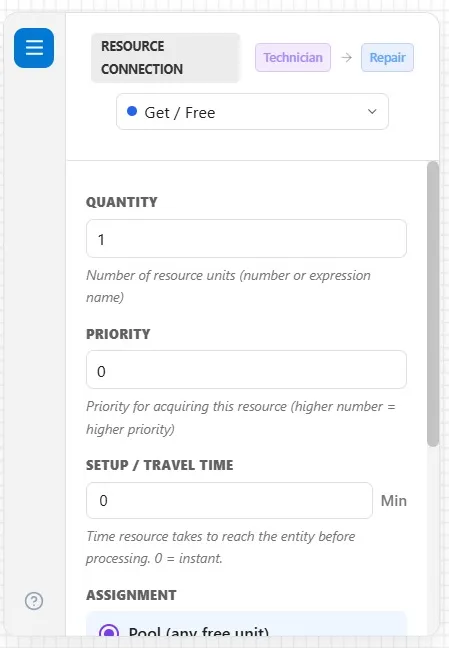
Get / Free means Repair takes the Technician for each customer and lets the Technician go when the repair is done. Quantity 1 means one Technician per repair. Click the empty canvas when you have read it.
The model is complete: customers arrive, go through three steps, and Repair uses the Technician.
Step 7. Set the run to one shop day
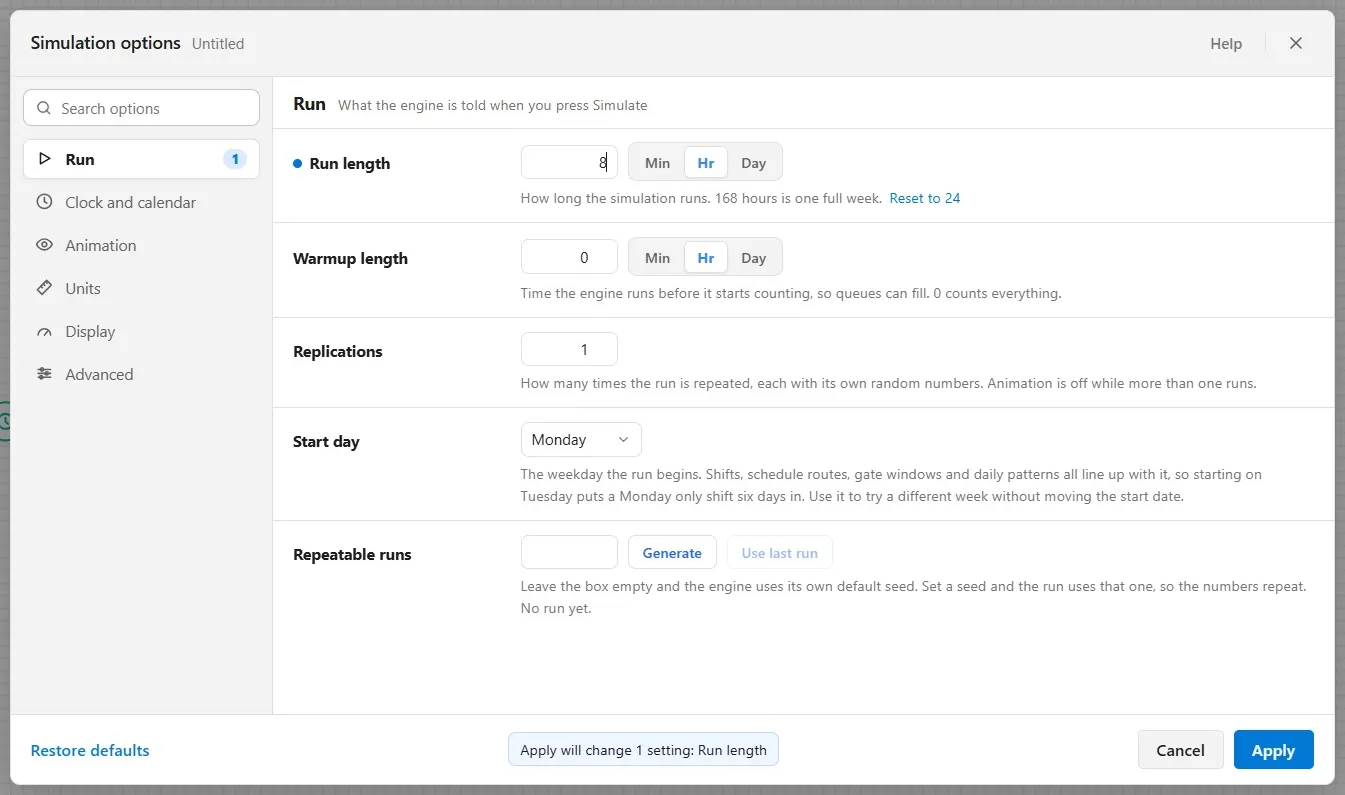
Before you run a model, tell it how long to run. A new model runs 24 hours; the shop is open for 8.
- On the toolbar, click Simulation Options. It opens on the Run group.
- Run length reads 24, with Hr chosen. Type 8: one shop day.
- Replications stays 1, so the model runs once and you can watch it move. (In Chapter 1 you ran five; with more than one, nothing is drawn.)
- Read the line at the foot: it names the one setting you changed, Run length. Click Apply.
Step 8. Run it and watch the line build
- On the toolbar, click Run Simulation.
Customers start to move from step to step. Four live cards appear at the top left, and they are worth learning now, because you will read them in every chapter:
- Throughput counts the customers who finish.
- Avg Throughput Time is how long a customer spends in the shop, from walking in to leaving.
- WIP, work in process, is how many customers are inside right now.
- Process Efficiency is the share of a customer’s time spent being worked on, rather than waiting.
Now watch Repair. It turns red while it works. A small blue count on its top left corner is the number of customers waiting for the Technician.
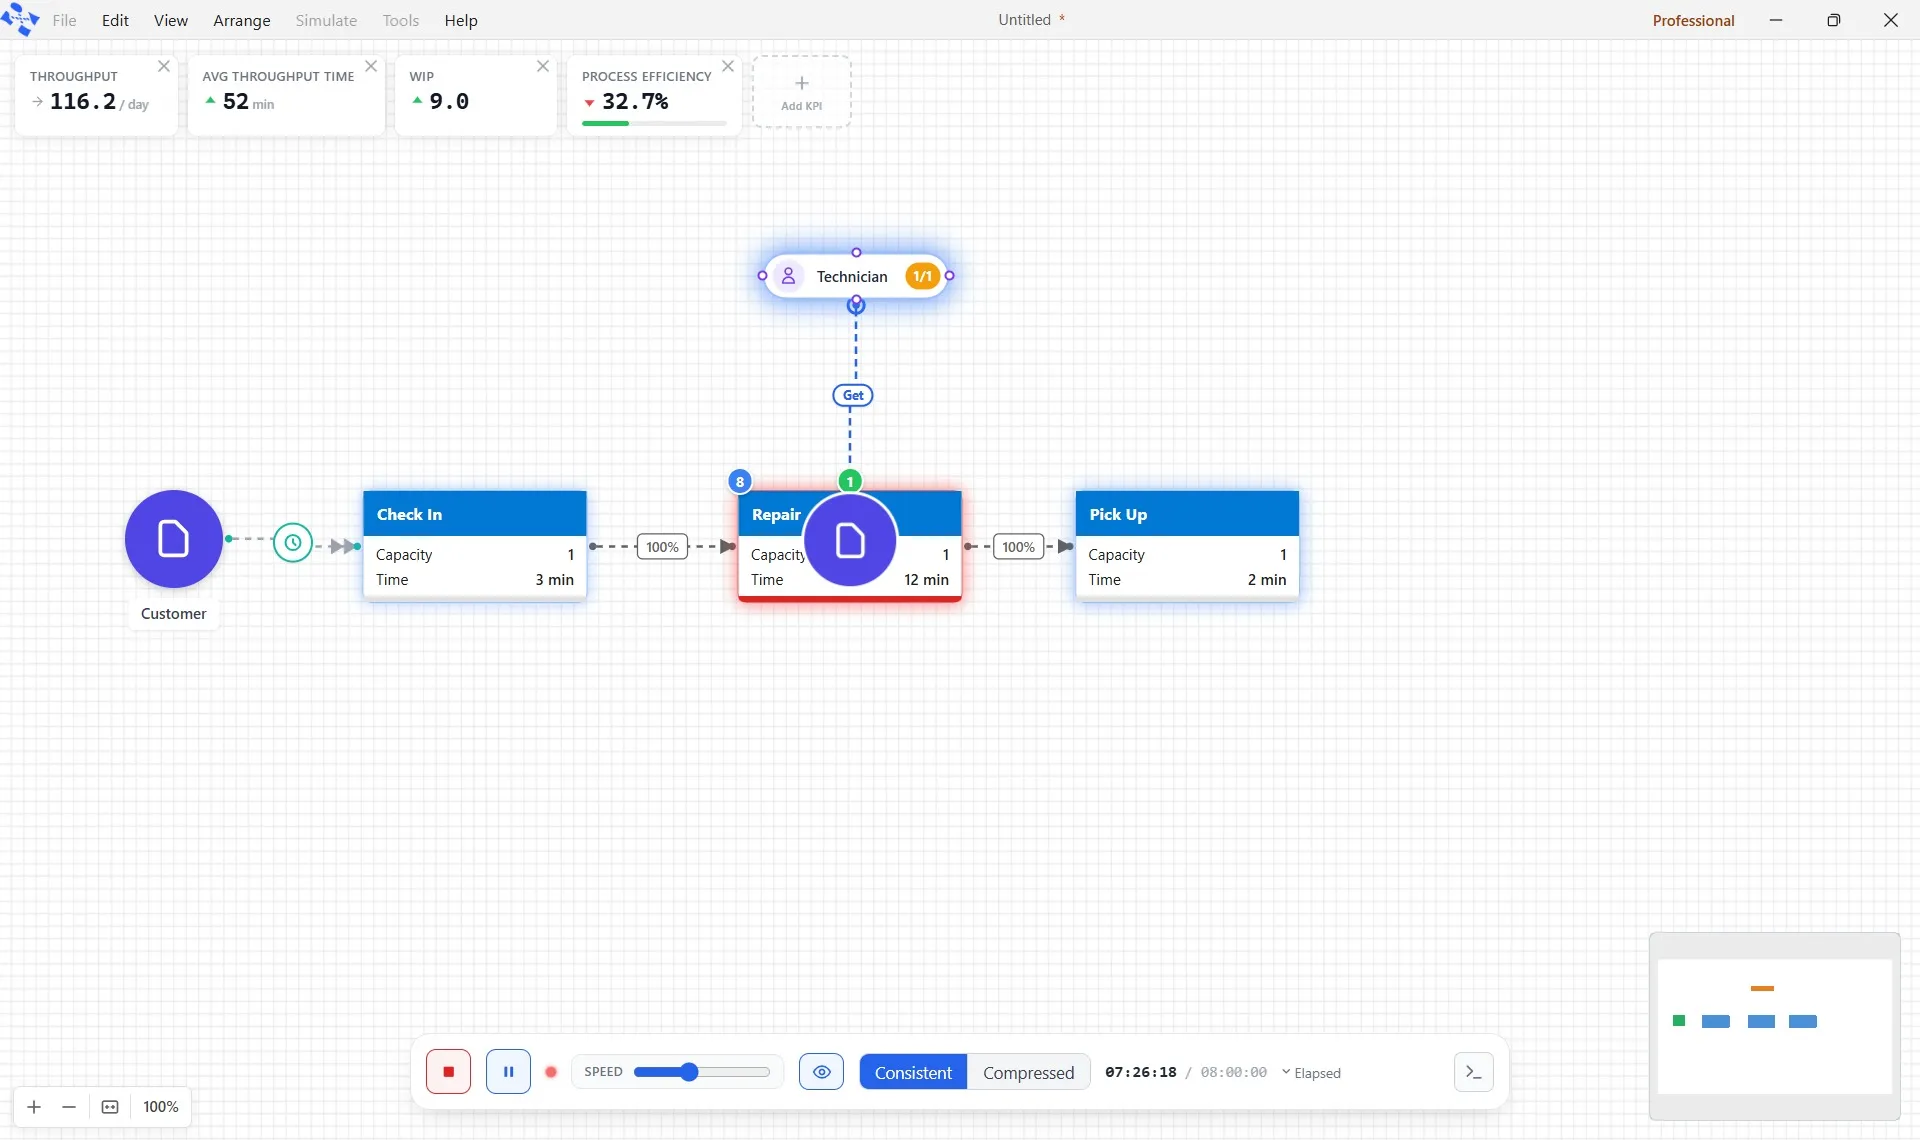
What you should see: the count on Repair’s corner climbs through the day, to 8 by the end. The cards climb with it.
Step 9. Read the cards before you answer
When the day ends, Simulation Complete says how many customers went through. The cards stay on screen behind it, so read them now: they go when you answer.
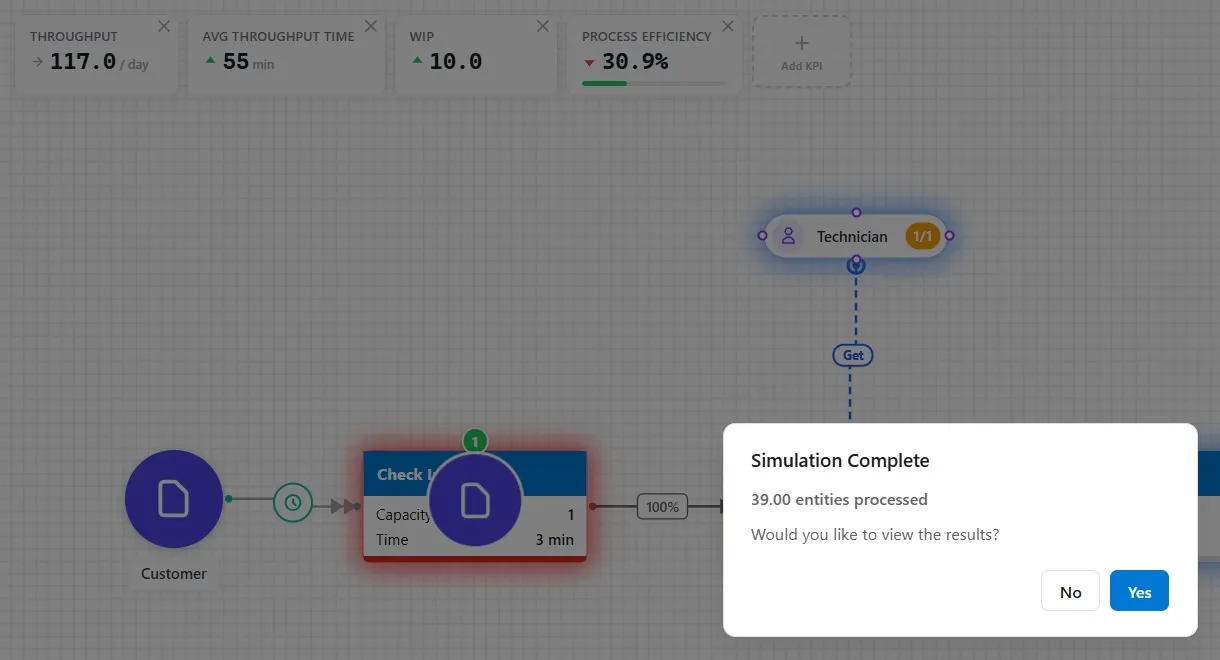
- 39 customers went through.
- Avg Throughput Time, 55 minutes, though the three steps take only 3 + 12 + 2 = 17. The other 38 minutes, on average, were spent waiting.
- WIP, 10: ten customers are still inside when the day ends.
- Process Efficiency, 30.9%: less than a third of a customer’s time is spent being worked on.
Here is why, and it is the most important idea in this chapter. Repair needs 12 minutes, but a new customer comes every 10. The Technician can never catch up, so the line grows all day long. Nothing is broken in the model: it shows you exactly what that shop would do.
Click No. For now the cards tell you what you need; Chapters 10 and 11 teach the Output Report.
Step 10. Fix it with a second Technician
A model’s real value is trying a change before you make it in the real shop. Give Repair a second Technician.
- Double-click the person icon on the Technician (a double-click on its name renames it instead) and set Quantity to 2. The badge on the shape now reads x2.
- Double-click Repair and set Capacity to 2, so two repairs can happen at the same time. Both changes are needed: two Technicians are no help if Repair can only take one customer at a time.
- Click Run Simulation again.
What you should see: this time no count builds on Repair’s corner. Two Technicians finish two customers every 12 minutes, more than the one who walks in every 10, so each customer is taken as soon as they arrive.
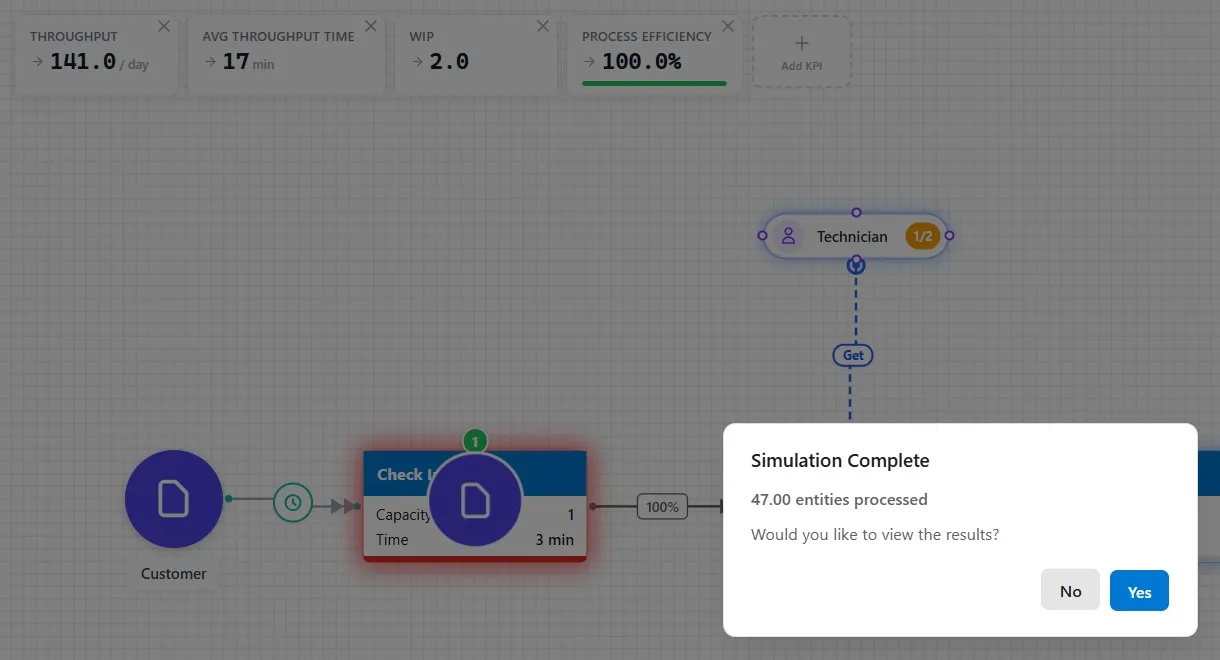
Read the cards: 47 customers, 17 minutes in the shop (just the time of the three steps), WIP 2, Process Efficiency 100%. Nobody waits. Click No.
Step 11. Save it
Chapter 3 starts from this model, so save it where you will find it again.
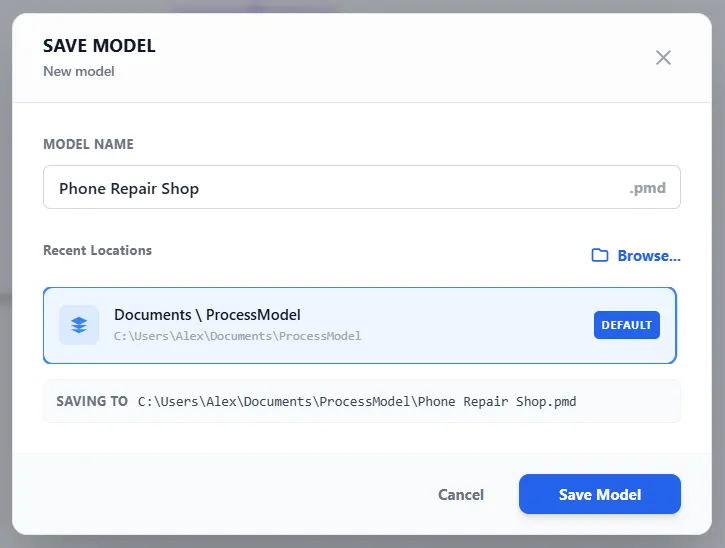
- Click File, then Save As.
- In Model name, type Phone Repair Shop.
- Pick a folder you will find again, and check the path shown under Saving to.
- Click Save Model.
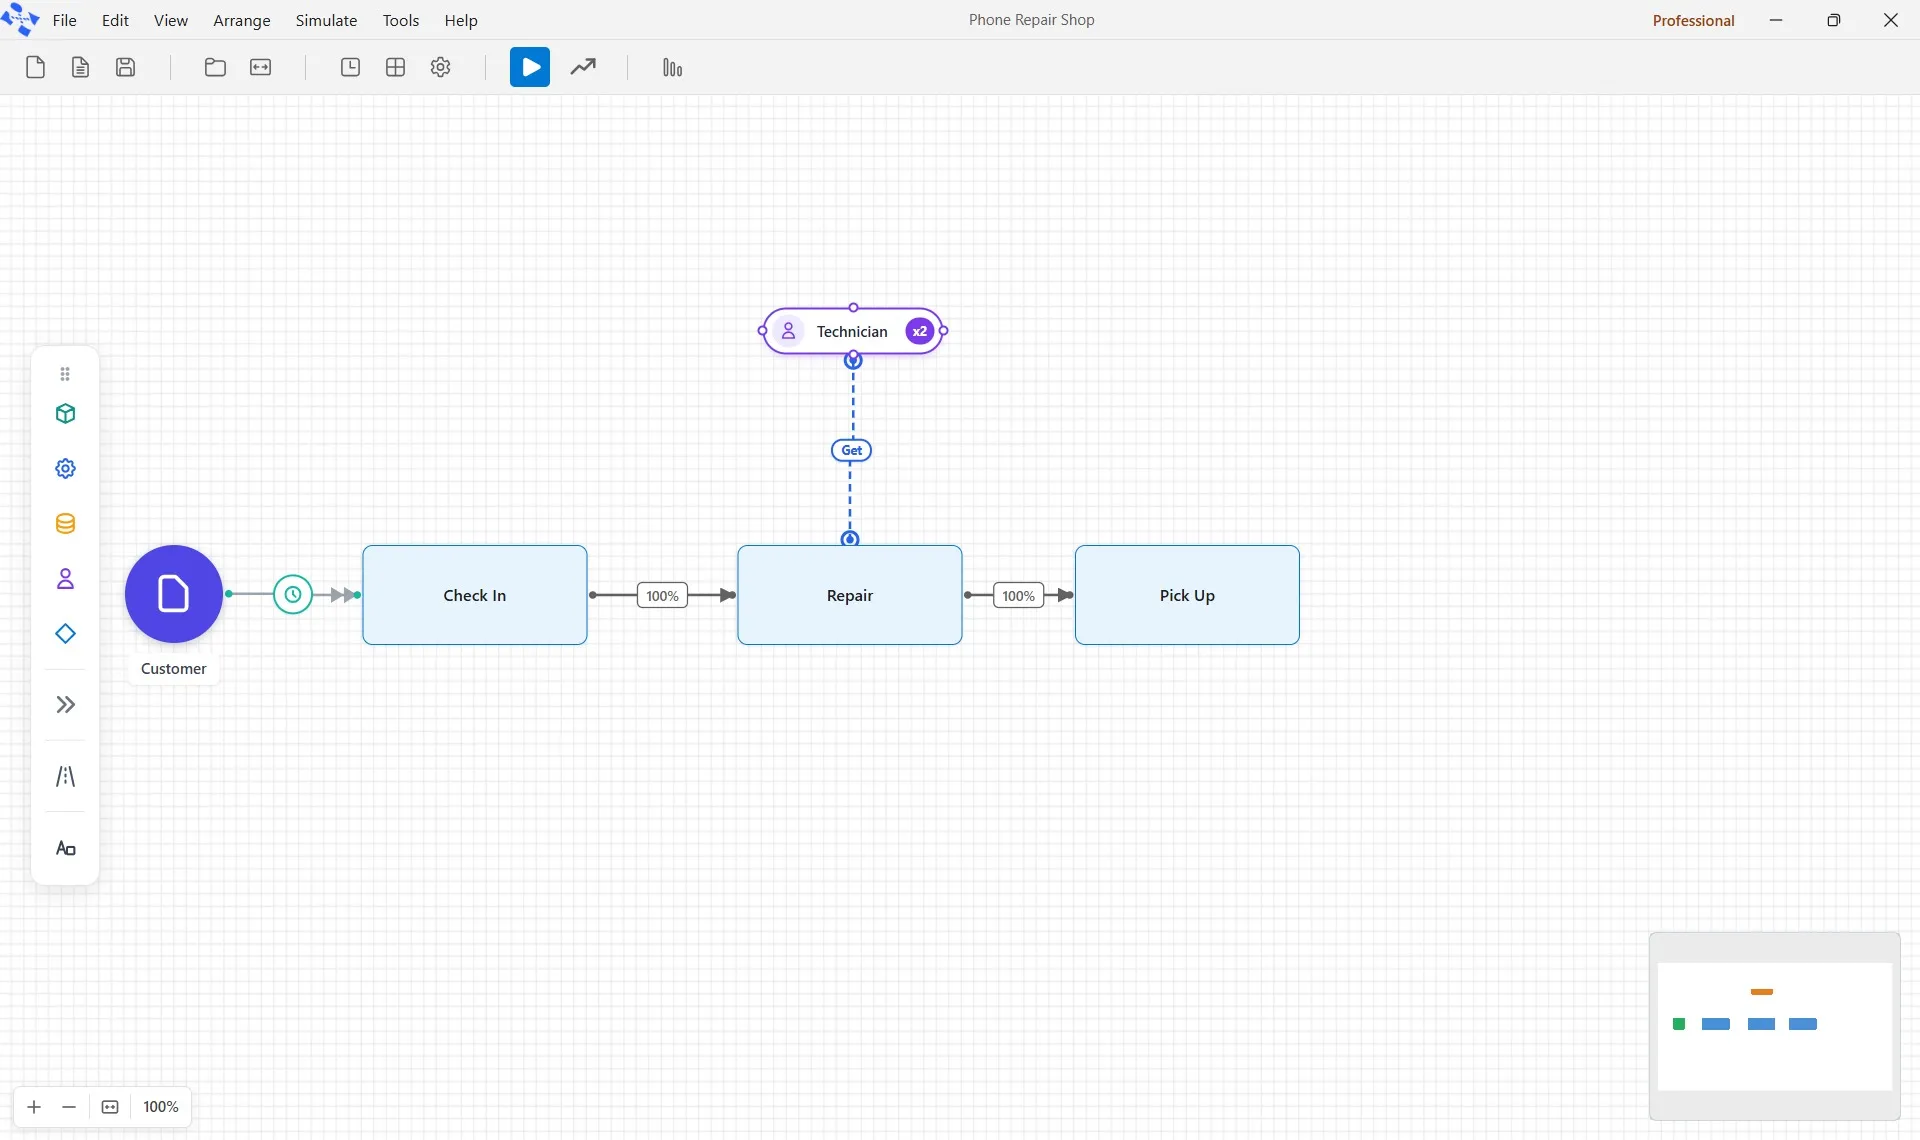
What you should see: the title bar now reads Phone Repair Shop.
Your practice model
You build this one yourself, and that is the point: there is no shortcut to the feel of building. When you are done, compare your shop with the course’s own, the shop as this chapter ends, with two Technicians.
- Start fromAn empty canvasBlank Canvas on the Welcome screen: you build the shop yourself, step by step.
- Compare withChapter 2. Your First ModelThe shop as this chapter leaves it. Open it when you are done, and check your settings against it.
The model to compare with is in File ▸ Demo Models, in the Self Teach Guide group. A demo model opens as a new model, so the original never changes.
Check yourself
Try it yourself
Before you close the shop, find the smallest fix on your own.
- Set the Technician back to 1 and Repair’s Capacity back to 1. Then make Repair faster instead: set its Processing Time to 9 minutes.
- Run it again and read the cards before you answer.
Mark it done
When your Phone Repair Shop is saved and you can explain why the line built in the first run, turn on Done.
You watched this chapter's video.Not watched yet: the video is marked when it plays to the end.
Kept in this browser only, and shown on the course page.