
Most organizations have a procedural guide that spells out what is supposed to be done and by whom, and that is about it. Worse, when a process spans more than one part of the organization, you will rarely find a worker or manager who understands how it performs beyond their own area of responsibility. Because there can be a wide and undiscovered gap between how the guide says a process works and how it actually works, it is worth seeing for yourself. One of the most useful ways to validate the essence of a process is to walk it from one end to the other, taking quick notes as you go.
“It’s rare to find an immediately available, true and correct description of a process under study.”
Walk the process to discover the real flow
The value of this step is the firsthand knowledge the modeler gathers: where reality drifts from expectation, and what issues sit at the core of the process and make it behave the way it does.
Some people feel it is faster to call a group of process experts into a room and build the process by listening to them describe it. Our experience is the opposite. That approach takes several times longer and is less accurate. The modeler usually has a better sense of how the model should be built and why a given structure fits, and that judgment is far easier to apply when ten people are not standing over their shoulder.
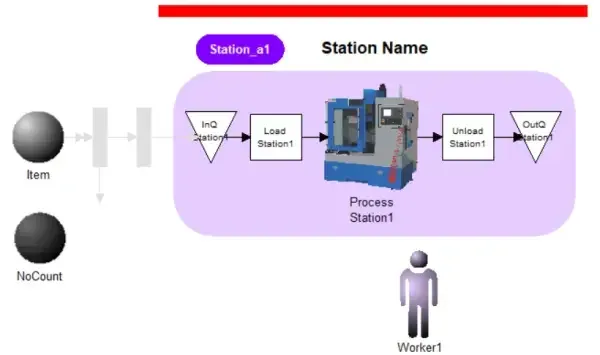
Walk the process and make quick notes of the flow. Ask the expert to start with the most common path, note the exceptions, and return to them later. Collect the duration of each activity, the splits and combinations, and the resources used, along with what happens at each step.
As you walk, gather every data entry form in use. If a form is electronic, take a screen capture and highlight the fields that get entered or changed. Number each form and write the same number in your notes where the form is used, so you can link them later. Do the same for any other tools, devices, or aids the process needs.
Process duration is best captured with three points. Ask “How long does it usually take to perform this operation?” Then “What is the shortest time it has ever taken?” And finally “What is the longest time it has taken?” Those three values form a triangular distribution for use in ProcessModel, written T(min, most likely, max). That time eventually goes in the time field of the general tab. Capturing the variability of a process is essential to building an accurate model.
Hold the walk to no more than two hours of note-taking before you build the model. Longer walks put time pressure on the expert and slow the gathering in the later hours. A large process can still be walked if you explain that you need only the flow, not the political history of the company or every feeling about each step. Let the expert ramble and you can lose 15 to 30 minutes before you notice the detour.
How much detail should you collect? It depends on how the information will be used. If you are trying to gather enough to improve the process entirely on your own, you will need an enormous amount of data, which is rarely advisable and usually not feasible in the time you have. If instead you are helping the process expert improve their own process, you need far less, and that is always the better choice. As Allan H. Mogensen, the father of work simplification, put it, “The person doing the job knows far more than anyone else about the best way of doing that job and therefore is the one person best fitted to improve it.” Your role is to act as the catalyst. You need to know where things go, what each step is, and how long it takes, plus the major decisions, their percentages, the timing, and the resources used.
Build the process model
Build the model the same day you collect the information. Wait until the next day and you will lose the critical detail needed to portray the process accurately.
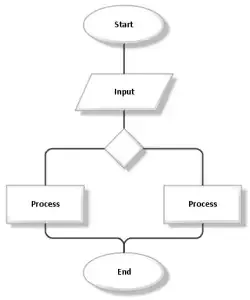
Build it so the most common path runs left to right across the top of the chart. You should be able to sight a laser straight across the top activities of your model. Anyone who looks at the chart will then know at a glance that the top line is the most common path and that every other path is less traveled. Avoid doubling back and crossovers wherever you can.
Exceptions to the main line should leave the main flow by dropping down first, then heading right. Developing left to right brings a second benefit: it is much easier to pin a large process on a wall when you do not need a ladder and a spotter every time you present a review.
Simulate the process model
The third trick may seem odd at first, but it makes complete sense once you use it. In fact, you may find it the most valuable asset in your process improvement toolkit. Here it is.
Build the first model without timing. Leave all processing times and decisions at their defaults. Enter an arrival time that spreads arrivals far enough apart to see only one entity at a time in the model. Then set each route move time to reflect the length of the route: a one-inch route becomes one minute, a 10-inch route becomes 10 minutes, and so on. Simulate the model to test the flow. Once you are convinced it reflects your notes from walking the process, bring the computer to the process expert (or the expert to your computer) and have them watch it run. Every single time we have followed this procedure we have uncovered errors in the process description. People who spent weeks drawing a flowchart have spotted problems in the flow within the first two minutes of simulation. The animation helps people understand the flow at a much deeper level.
Do not do any detailed model building until you have verified the flow is correct. Adding detail before the flow is right is like changing the forms after the concrete has been poured. It is not impossible to fix, but it takes many times more effort than it should.
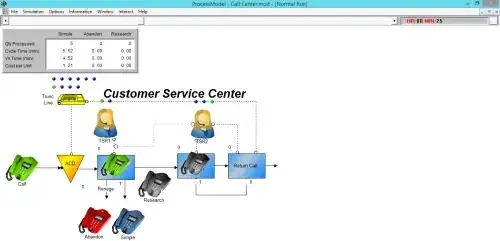
Use one of the demo models in the trial copy of ProcessModel to verify the flow and to make sure you have all of the data you need for the detailed model.
You will generally find that you need extra pieces of data the first walk did not surface. This is the fastest method we have found for capturing and modeling the real process. With the flow confirmed, you are ready to build the detailed model. One note: if you do not have a model of the current system, it will be hard to show where the improvement came from, which is exactly how your boss will measure what you accomplished. For more on the capture step itself, see how to gather the right information in a flash.